Written by: Lou Najjar-Rulin
3D printing is a great option when you need parts with very specific measurements, lots of detail, or pieces for a variety of applications, but 3D printing is limited to the specific materials meant for each machine we have on campus, so you may find yourself needing to prepare your print so you are able to make a mold of it and cast copies in wax, plaster, plastic, concrete, rubber, ice, soap, butter, chocolate, cake, or any other casting material.
For certain parts this may also be a much cheaper way to produce multiples. For example, if you want 35 copies of a part that is $10.00 on the Formlabs you could pay $350.00 to have them all 3D printed, or print 1 copy for $10.00, spend anywhere from $10 (plaster or alginate mold) to $40 (silicone rubber mold) for the mold material, and then all you need to buy is your casting material. Assuming the original part is around 2in you could make your 35 (and more) plaster or concrete copies for less than $10, 35 wax copies for around $15-20, or could even cast certain low-temp metals for less than the original 3D print quote of $350. Of course this is just an example and all of these cost estimates will vary based on the size, resolution and level of detail of your prints as well as the mold making and casting materials you choose.
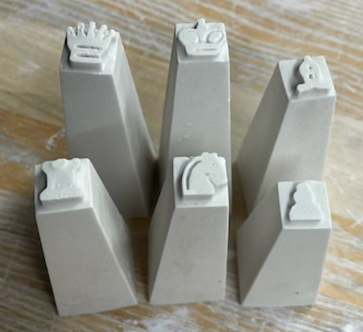
In this example I will print and cast a chess set. I printed versions of the pieces on the Formlabs as well as the Ultimaker. When you’re choosing a printer for a mold making project the most important factor to consider is how easy it will be to clean up support and smooth or fill the individual layer lines so they are not visible in the final castings. With both the Formlabs and the Ultimaker you’ll need to do some amount of sanding, even if they’re printed at the highest quality. That being said, a high quality Formlabs print can be dry sanded first with medium and then fine sand paper, and polished with the Novus plastic shine kit we have for checkout in the AOC. As long as you are delicate in your support removal this process should be fairly quick. If you don’t want to lose any mass while sanding I recommend clipping the support towers a bit long when possible, so they leave a nub you can sand off instead of a crater. Due to the ease of cleanup the acrylic resins on the Formlabs printers are an ideal option for a print you plan to make a mold of. On the Formlabs it cost about $30 to print one queen, one king, one pawn, one rook, one knight, and one bishop at 0.05 resolution.
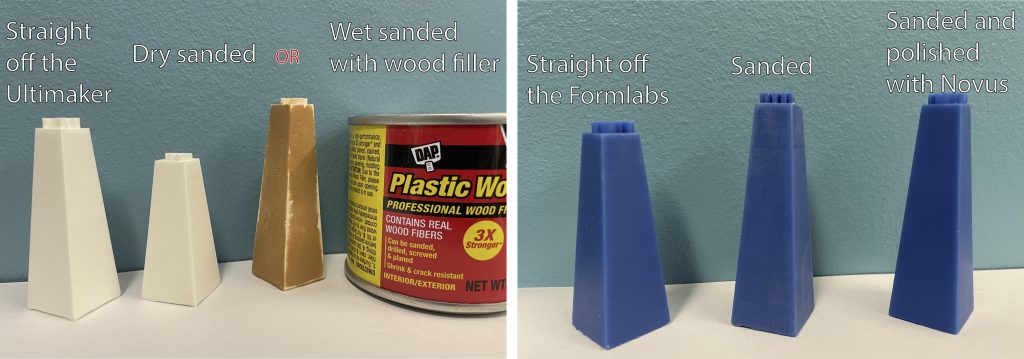
On the Ultimaker the same set only cost $2, but the layers are more apparent than on the Formlabs and the material is a bit more resistant to sanding. There are a few options for smoothing these parts. The first is to dry sand the part directly, same as you would with the Form parts. You can certainly get a part very smooth by using a heavy grit paper and working your way down to a finer one before polishing, but it will make your part slightly smaller as you’ll need to basically remove the whole surface in order to smooth out all those layers. The go-to method to avoid losing mass is to use some sort of filler before sanding, so I tried two types. The first is a sandable wood filler. Most brands will work, but some more plasticy versions may fall off while wet sanding, such as those that dry pink or purple, so aim for something that is a mix of chemical and organic materials. I sanded the piece dry before adding the wood filler, which is why it appears to only cover part of it. In fact that piece is even smoother than the dry sanded one right next to it, though the process of filling and sanding took close to an hour. The wood filler corrected mistakes made by my hand-sanding being slightly uneven.
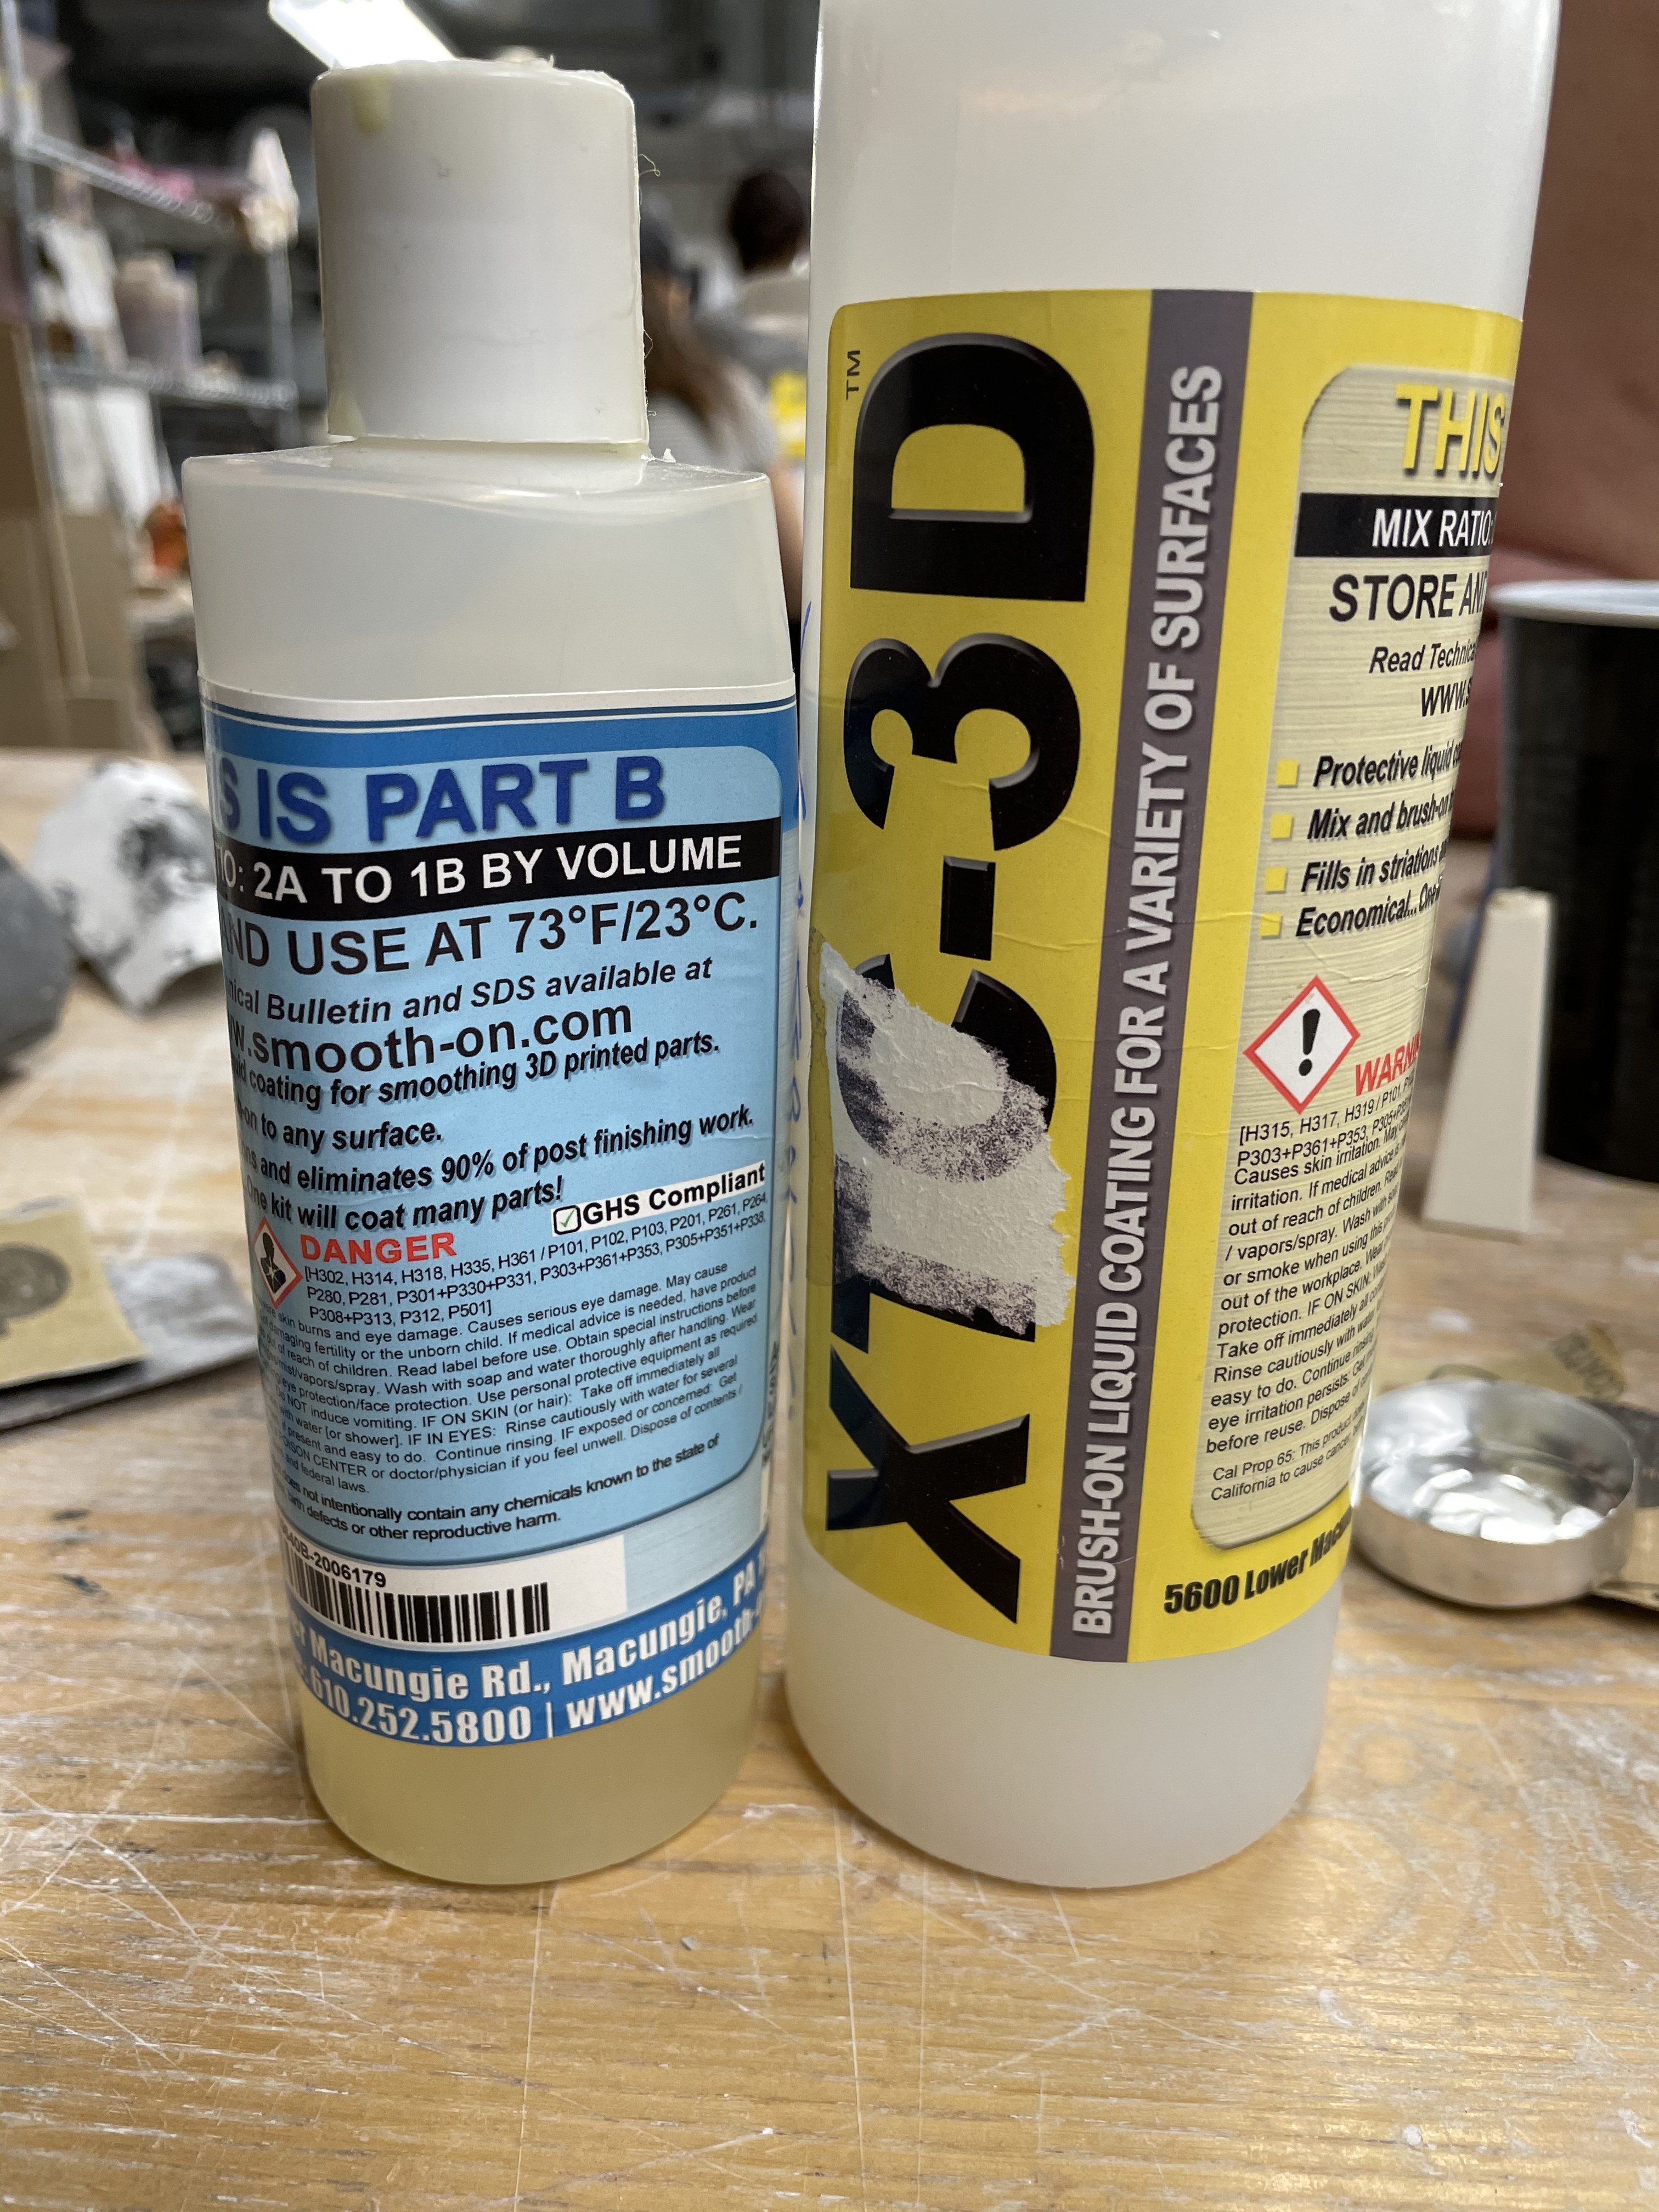
Another filling product, and the one I ended up liking and using for my final set, is an epoxy coating called XTC-3D. It is a two part mixture with a 2:1 mix ratio, meaning you use 2 parts A to 1 part B. This is a good resin for coating because you can paint it onto the surface of the print and any excess will run off, as opposed to a quicker drying product that may clog up detailed areas. I found this smoothing process more effective than sanding the print directly and quicker than the wood filler (mostly because I needed to go back in with more wood filler on small gaps after sanding and sand again, whereas the epoxy only required one coat). The best pricing for this product is at Reynold Advanced Materials, but it can also be conveniently found at Blick and Walmart. In the picture of the pieces coated with XTC-3D you may notice that the layers and the gaps on the detailed part of the model are still visible, but this is due to the XTC being clear and revealing the layers beneath. It is fully smooth to the touch.
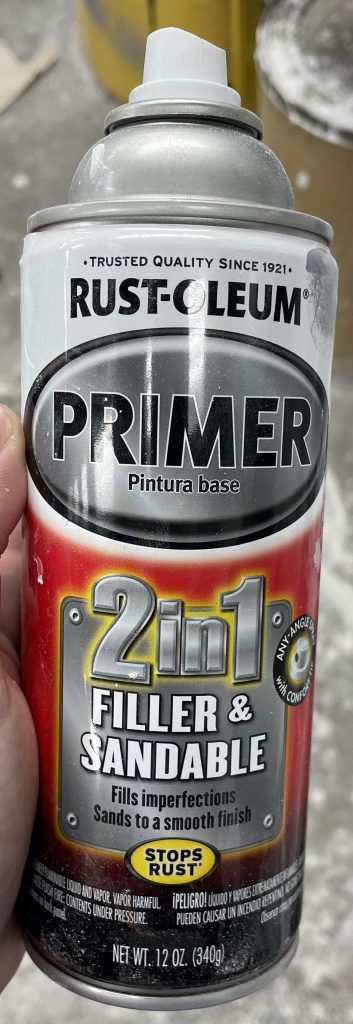
Another popular option is a spray on primer/filler from Rustoleum. I was not able to test this because spray paints are not sold within the city, but if you are able to get a ride to a nearby suburb you can use this product to save time and get a very even finish across your parts.
Once the parts are smoothed and cleaned to your satisfaction it’s time to make the mold. Depending on the shape and level of detail of your pieces you may be able to make a plaster mold, which is more time consuming but extremely inexpensive. For this example I will use silicone, because the symbols at the top of my parts are very detailed. Silicone is quite expensive, so the cheapest way to make a chess set is to make a single mold of each piece and then cast them repeatedly. This process will be slow, particularly in the case of the pawns which you would need to cast 16 times to fill the board, so another option is to make a single mold of each piece, cast the required amount of copies, and then make a final mold with one king and queen, two knights, rooks and bishops, and eight pawns so you can cast the whole set at once. To keep this demo less expensive I will only make one mold of each piece.
Look on the Smooth-On website for different options for both mold making materials and casting materials. The silicone I will use is called Dragon Skin FX Pro. It’s not really intended for poured molds of this sort and is usually used for special effects, but it’s available and Blick and I happened to have extra at home. The type of silicone you use may depend on what you wish your final material to be. If you plan to cast anything edible, make sure to find a food safe silicone. If you plan to cast in harder materials like concrete, choose a sturdier/less flexible silicone for maximum durability.
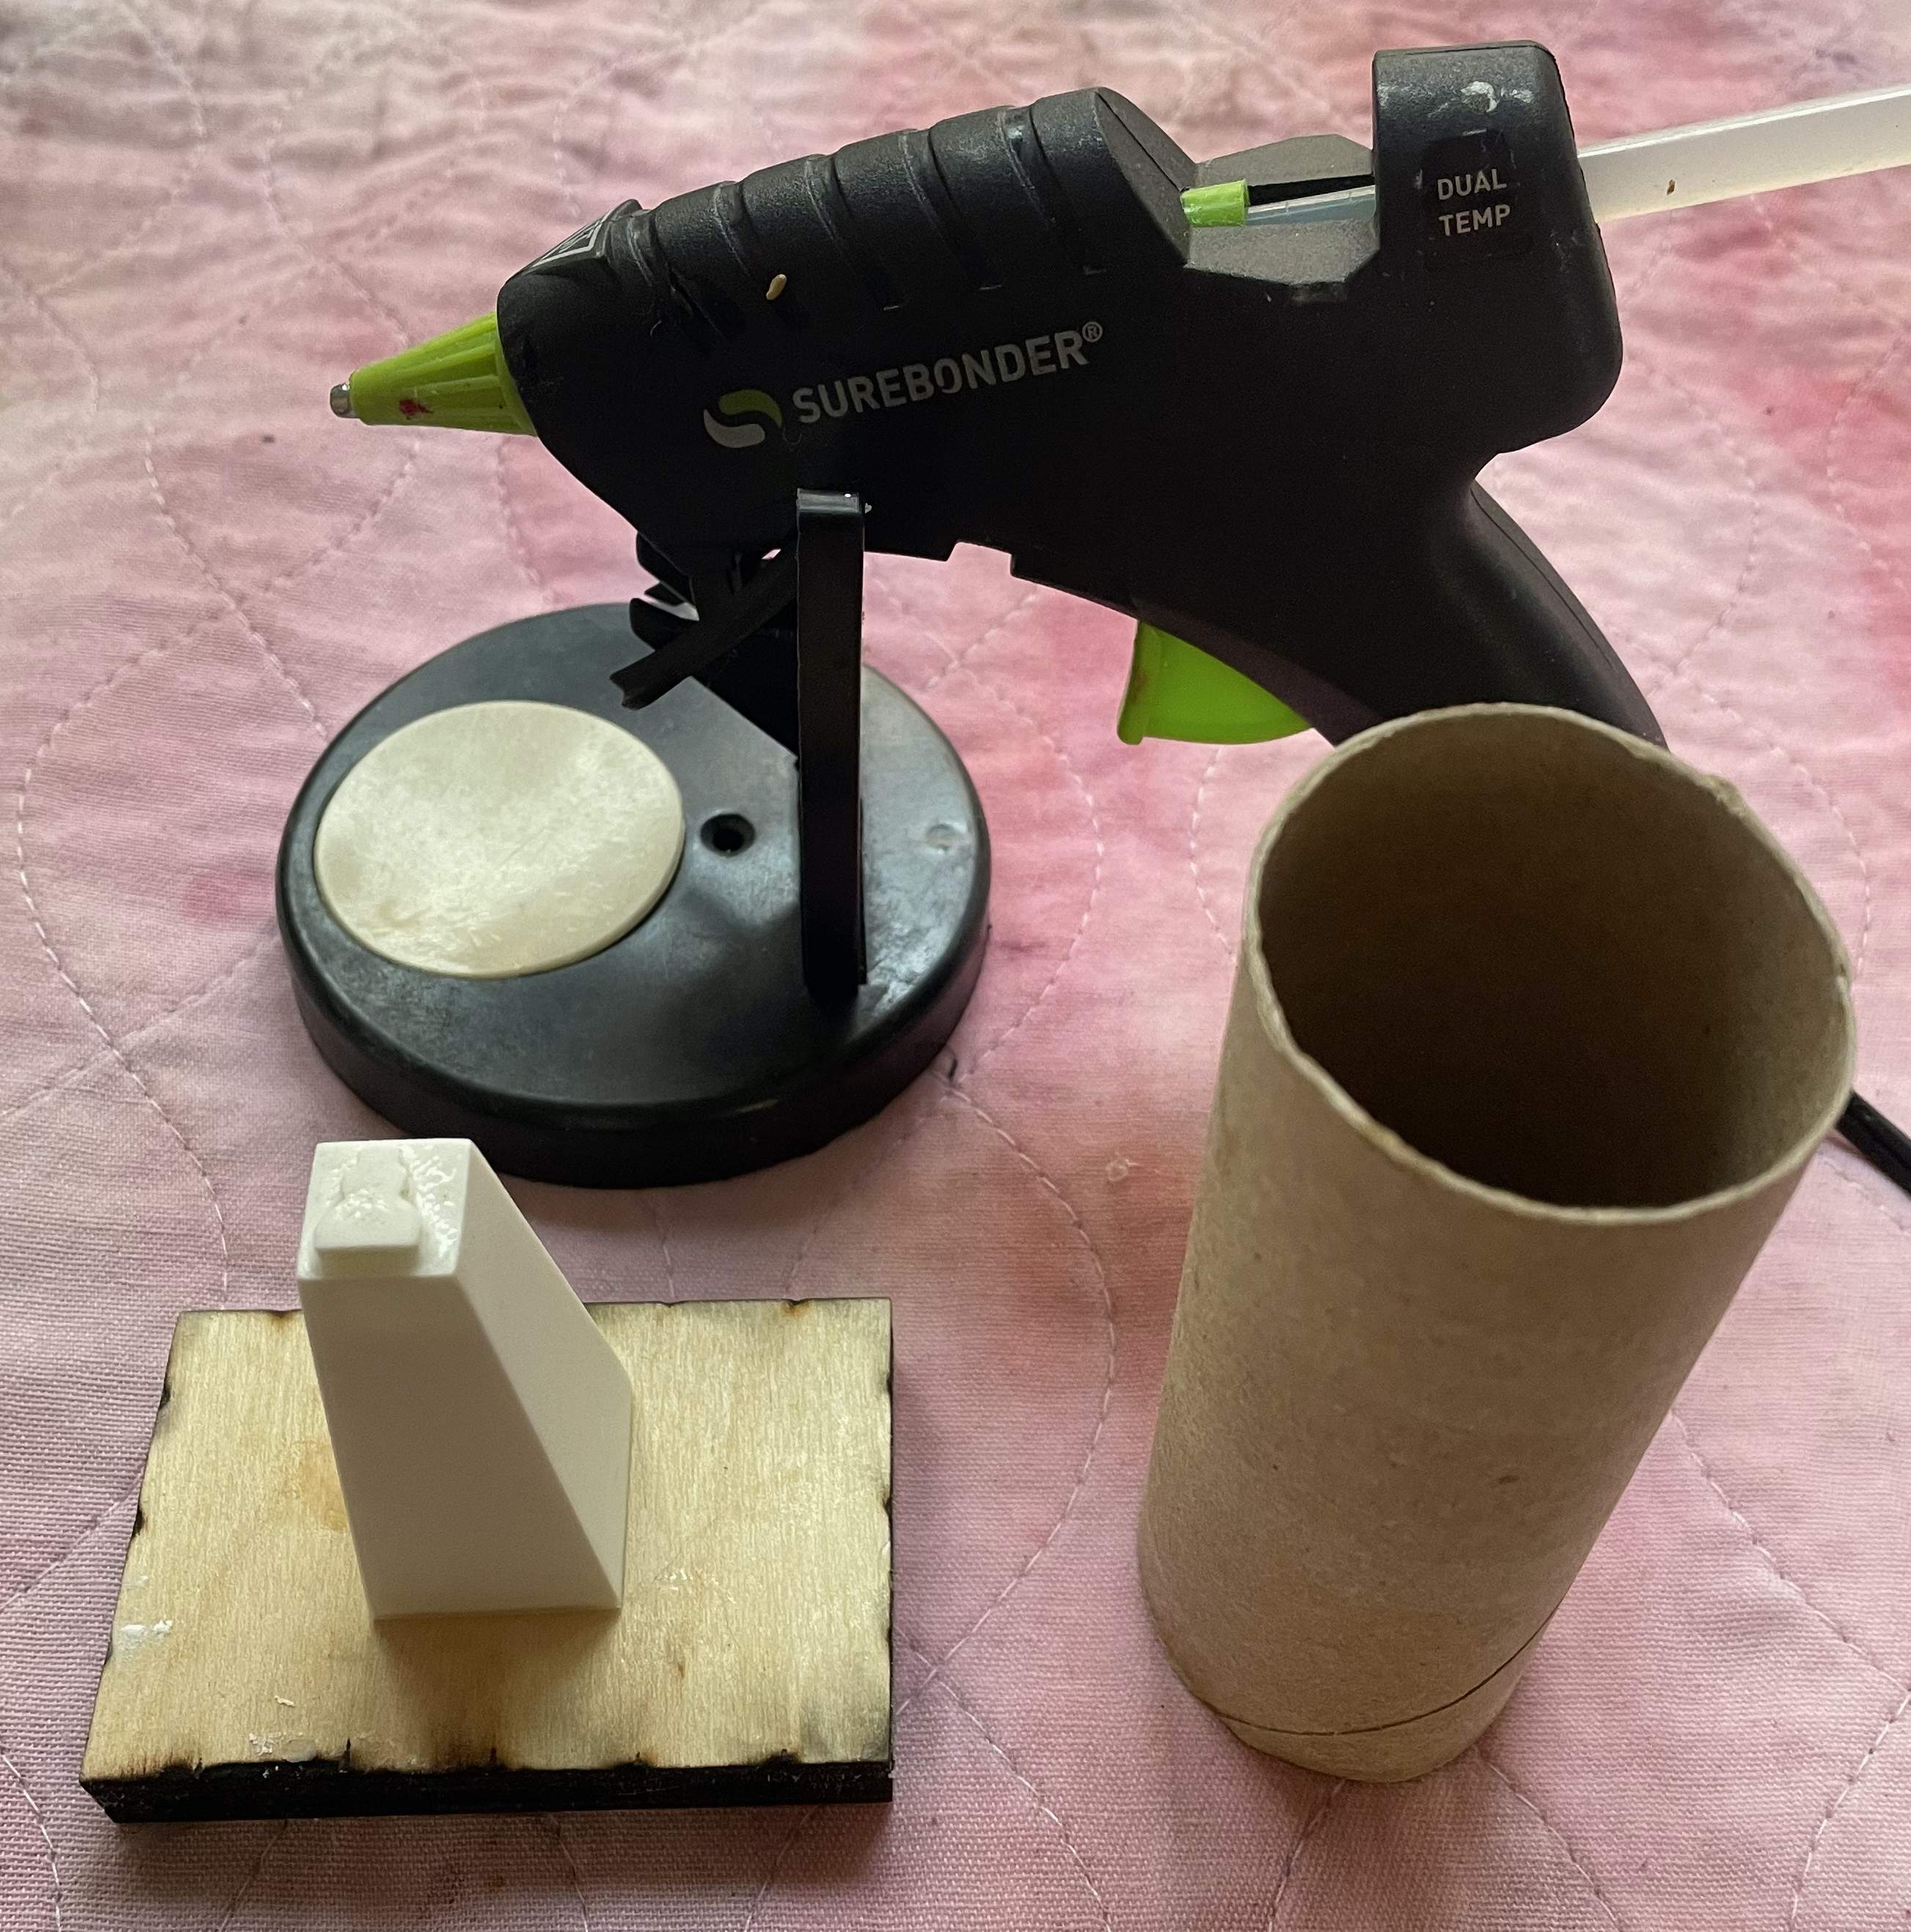
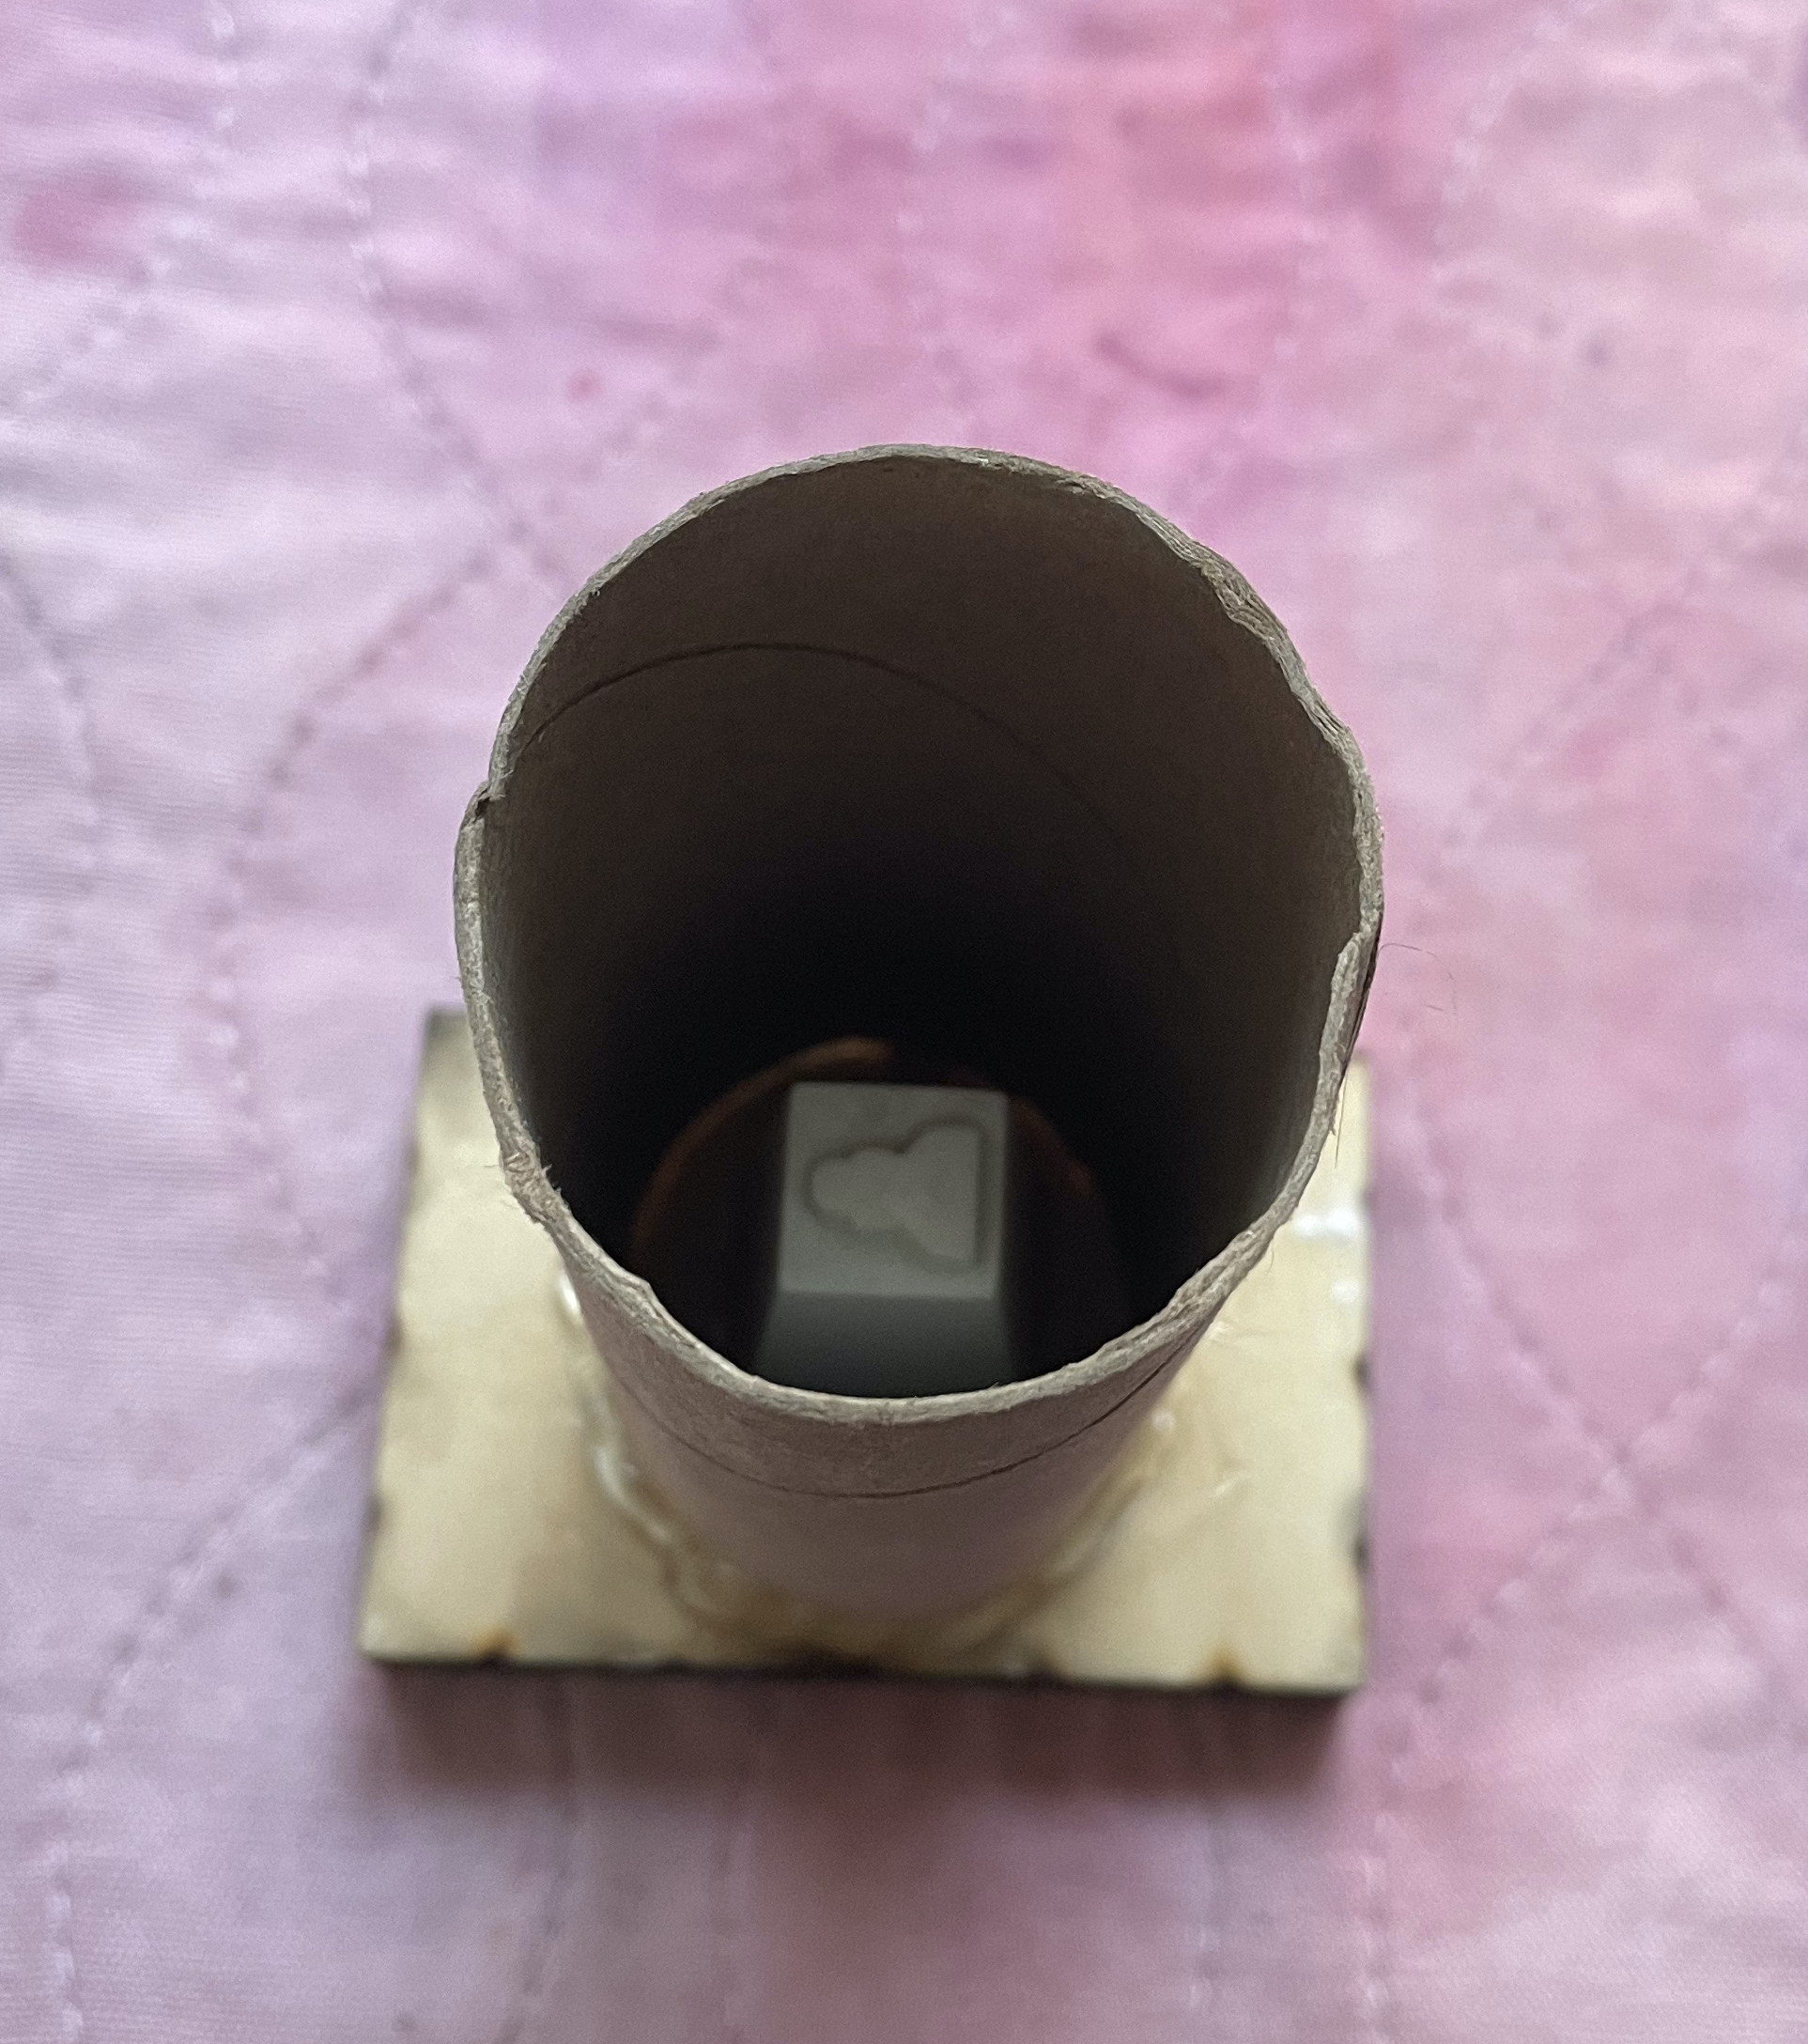
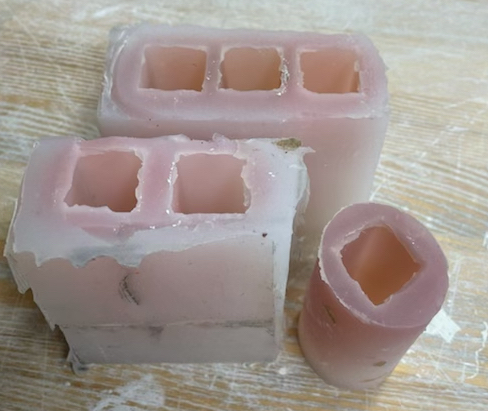
First glue your pieces to a flat surface with hot glue, and create a box around them with wood, metal, or cardboard. Some silicones will not cure on certain materials and will stay forever gooey, so make sure to research the silicone you choose. You can also call in to Reynold Advanced Materials and ask questions about a specific material, as they are the experts on mold making materials (and sell nearly everything you can imagine). For my pawn I used a toilet paper tube as a box and made sure the glue fully sealed the bottom, as the un-cured silicone will find its way out of any hole.
Before mixing the silicone there are 3 important things to note on the packaging. The first is the mix ratio. 1A:1B by volume means you need equal parts, so in that case you can use two containers of the same size and fill each one to the same point before mixing. If the ratio is by weight you’ll need to use a gram scale to make sure its precise or else the mixture may never cure.
The second and third important pieces of information are the pot life and the cure time. Pot life is how long you have to work with your material before it begins to cure. If the pot life is 12 minutes that means from the moment that Part A and Part B touch one another you have 12 minutes to stir and pour it. Cure time is how long it will take to be fully set, starting at the end of your pot life.
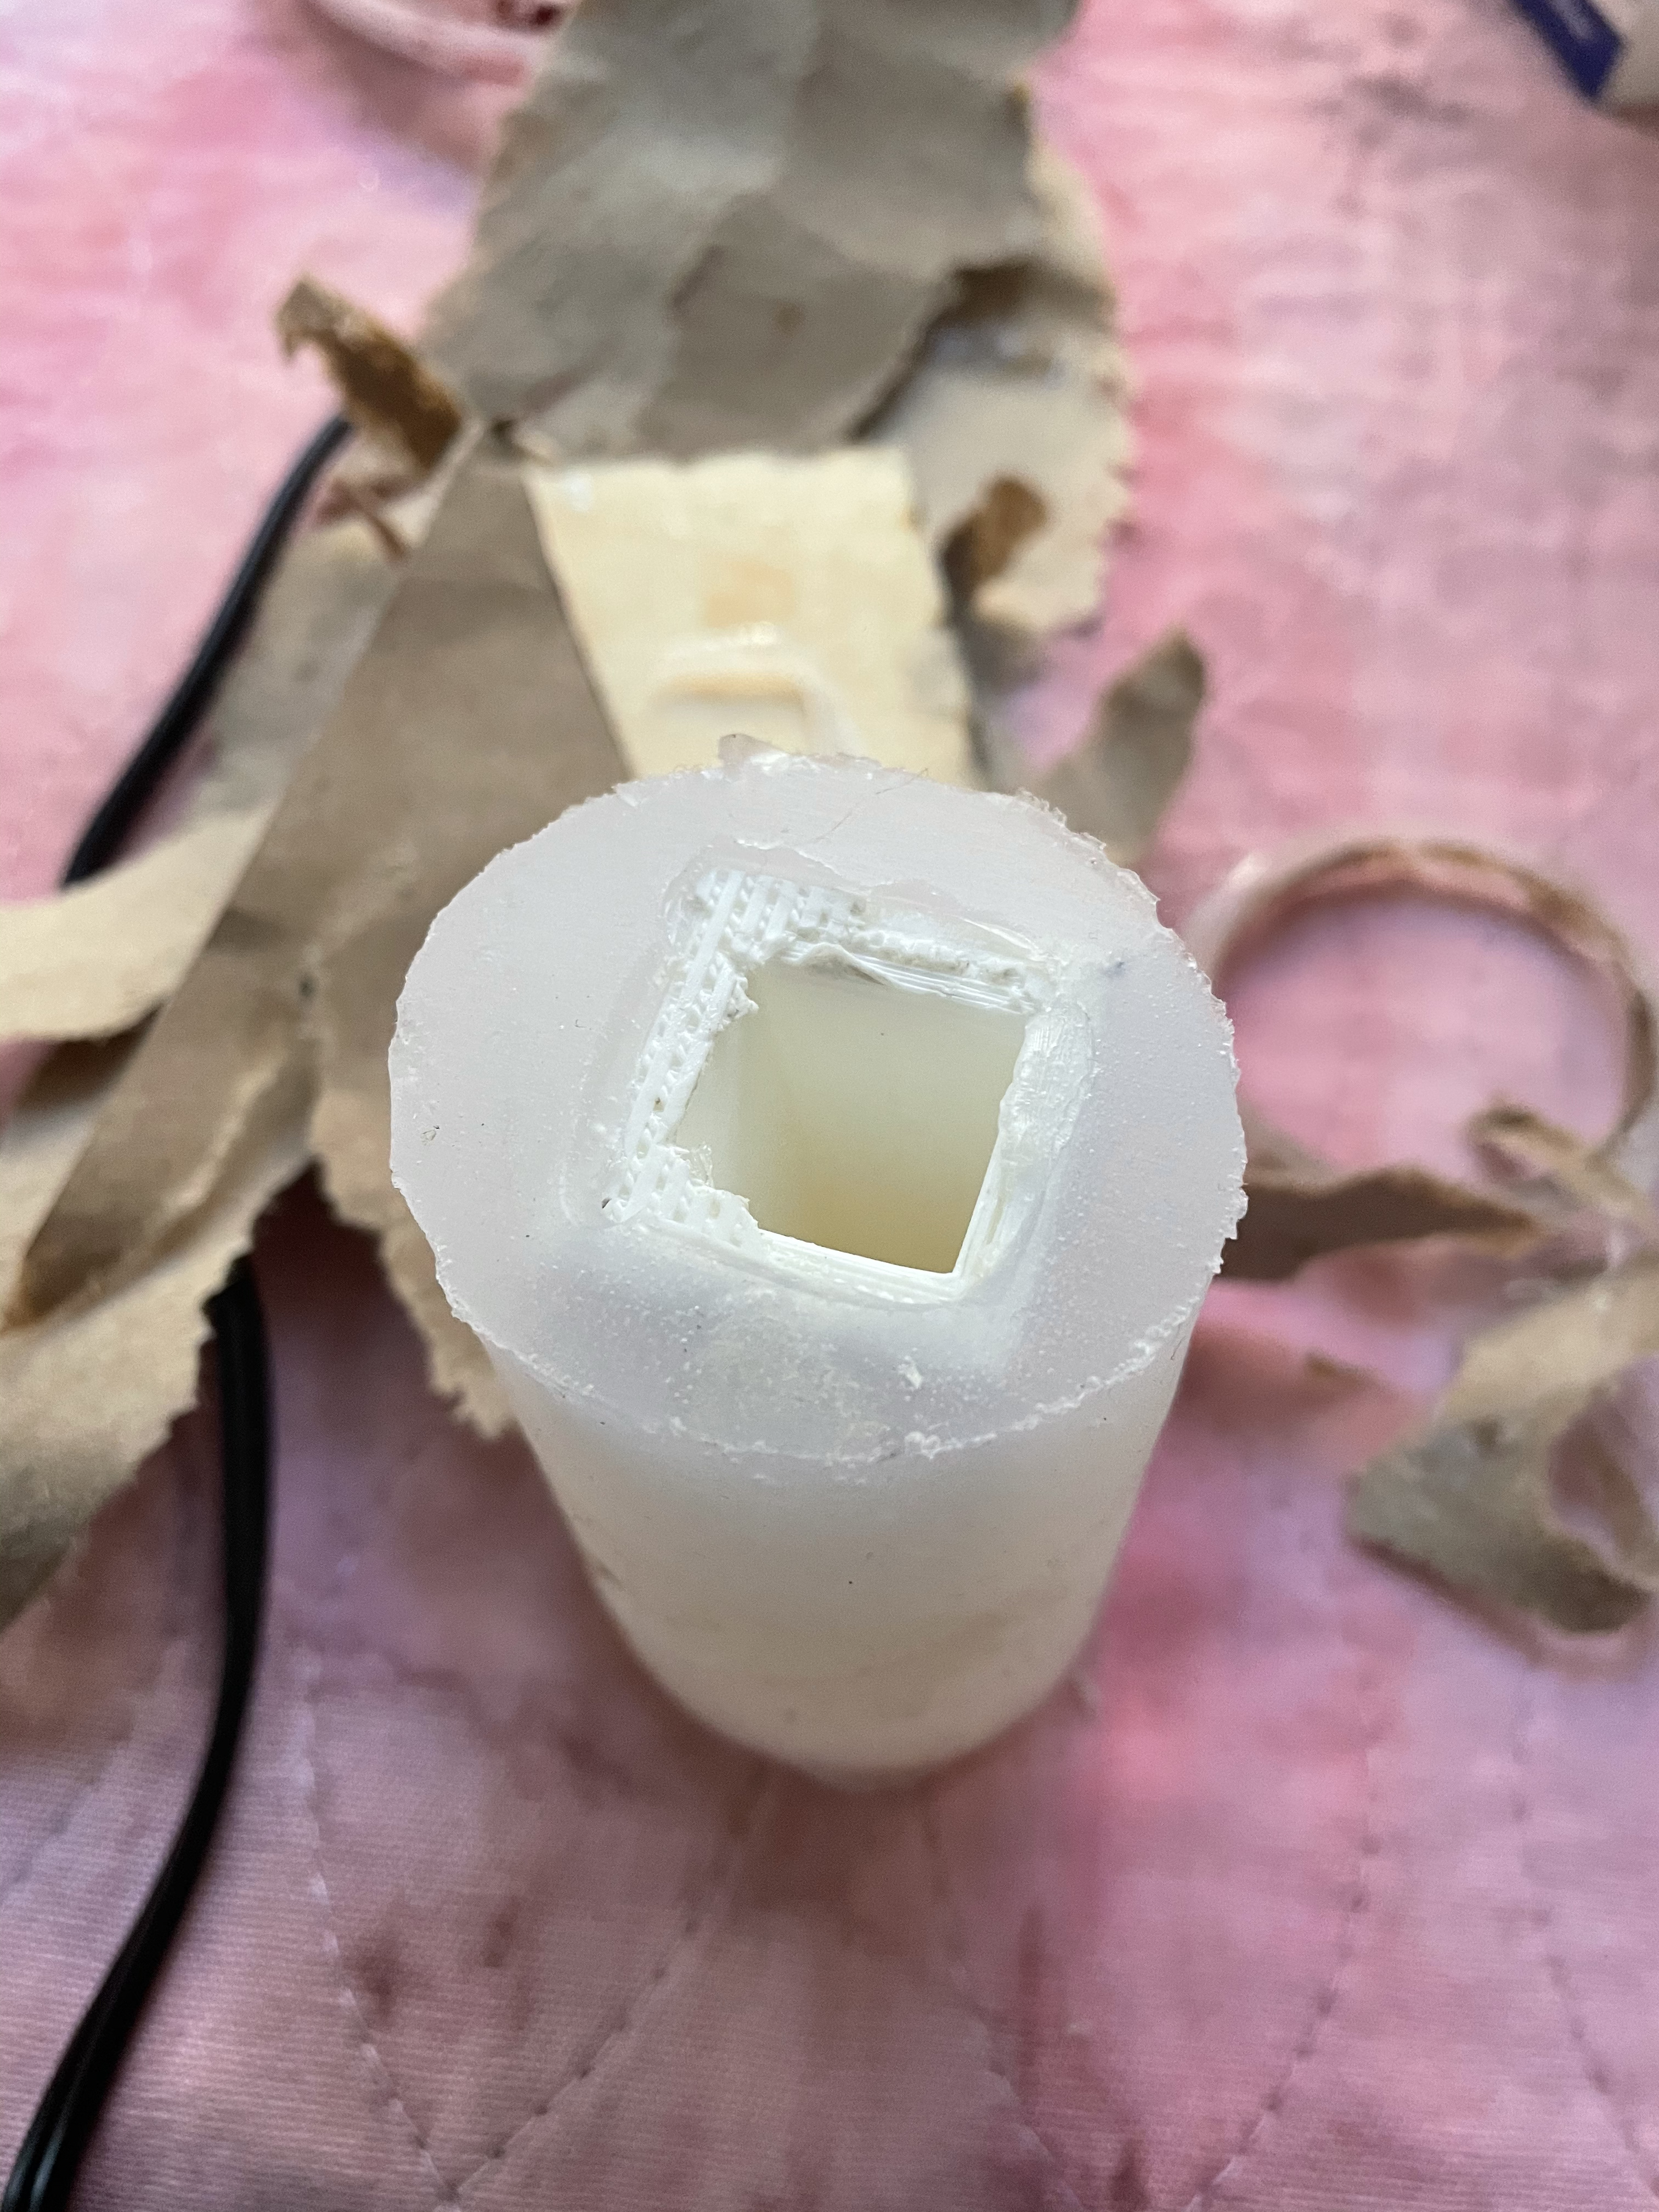
Mix your silicone as directed on the bottles, and transfer the mixture to another container and mix again, so be sure there is no unmixed material on the edges of the container that may compromise your cure. Mix slowly so you don’t create any air bubbles. From this container you can pour it into the vessel you created around your object. Pour at the lowest point of your mold (NOT directly over the object) so the silicone naturally flows into detailed areas and doesn’t create air bubbles. You can also try putting your mixed silicone in a vacuum chamber before pouring to eliminate bubbles. At the end of the cure time touch your material lightly to see if it is set before removing the box. If you used cardboard for the sides it may stick to the silicone a bit, but if its only on the outside of the mold it won’t affect your casts. This is how my pawn mold looked right after I took the cardboard off, but before removing the 3D print. You should have an open space in the silicone where your object was glued down. This is how you’ll remove the print. If your piece doesn’t come out smoothly you can make a zig zag cut halfway down one side to get it out, and just tape or rubber-band it shut when you fill it with casting material.
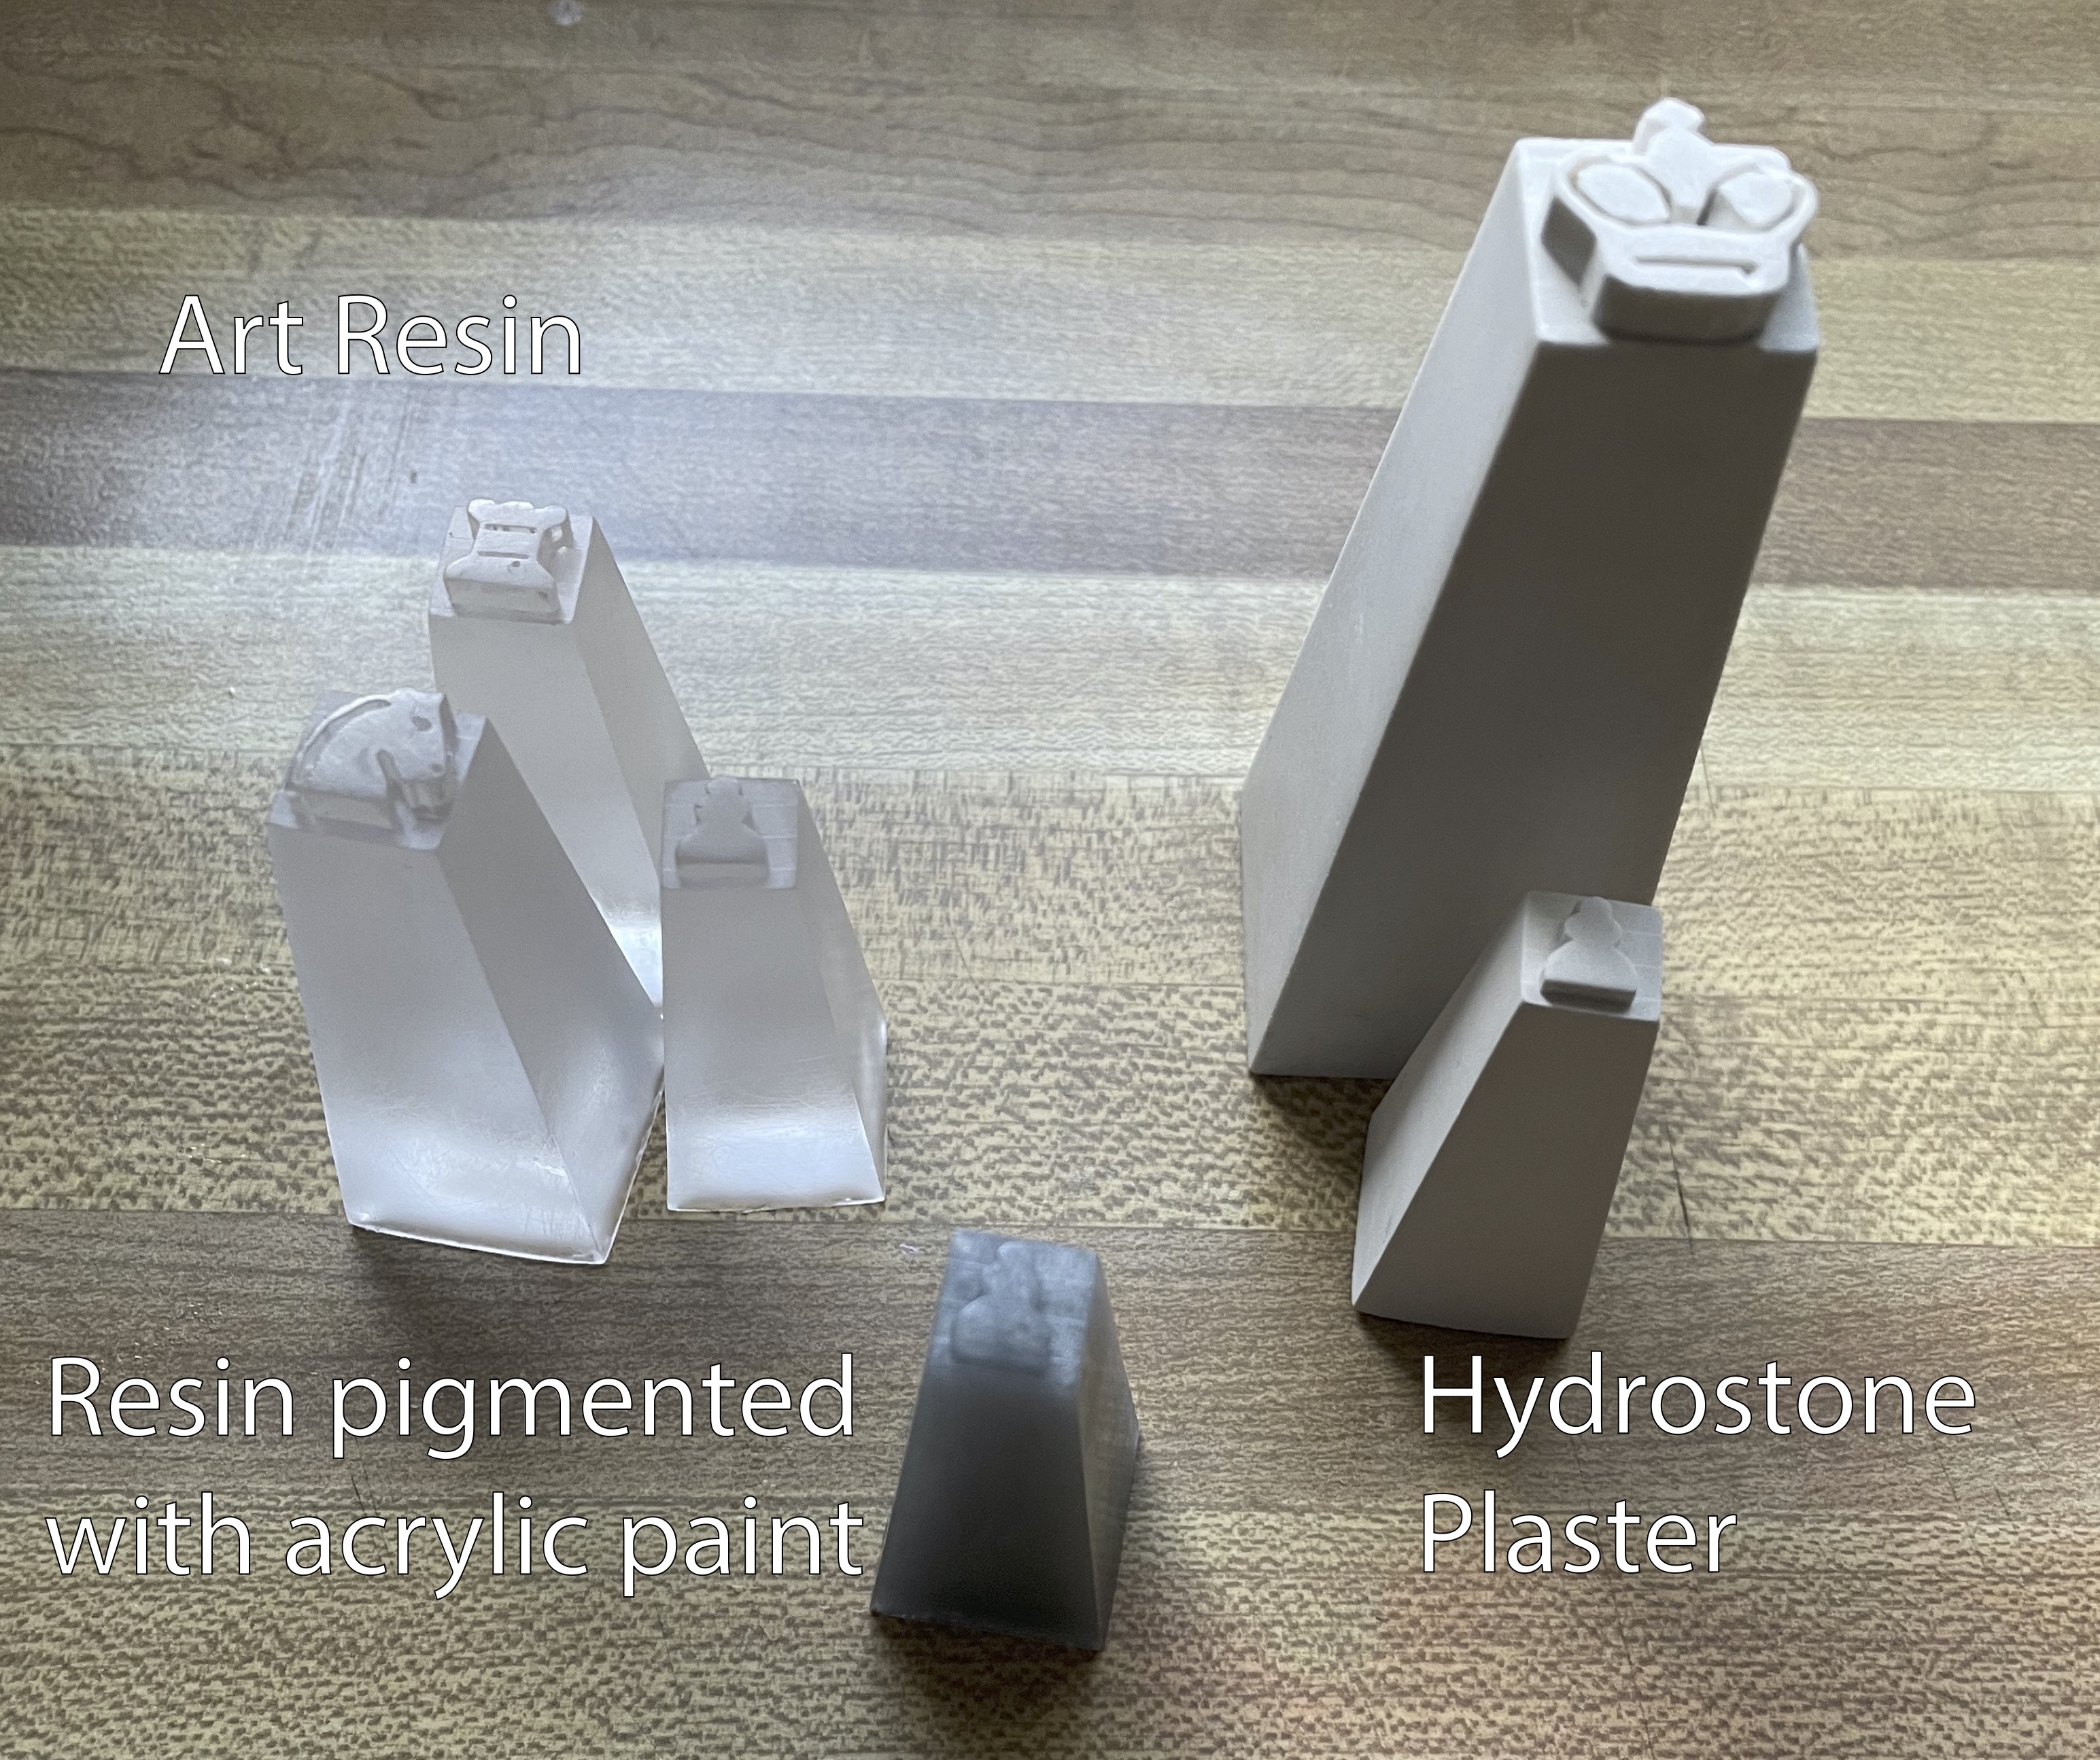
Repeat the process for each piece, and feel free to do more than one piece per mold. I grouped them by height, doing the king and queen as one mold and the remaining three as one. The pink staining on the molds is from casting wax. This silicone is very soft and picks up pigment from certain materials, but I cast plaster in them the following day and it came out at perfectly white as ever.
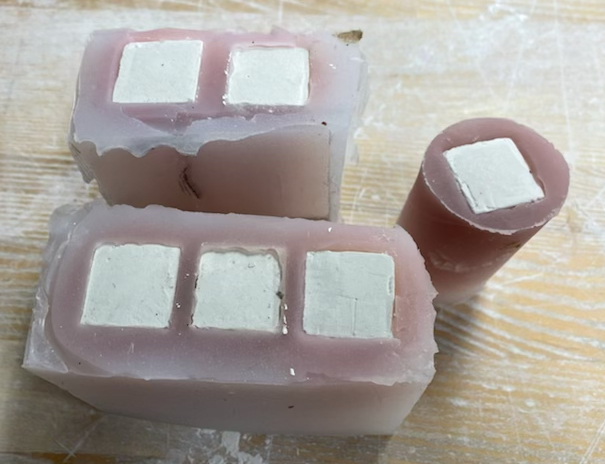
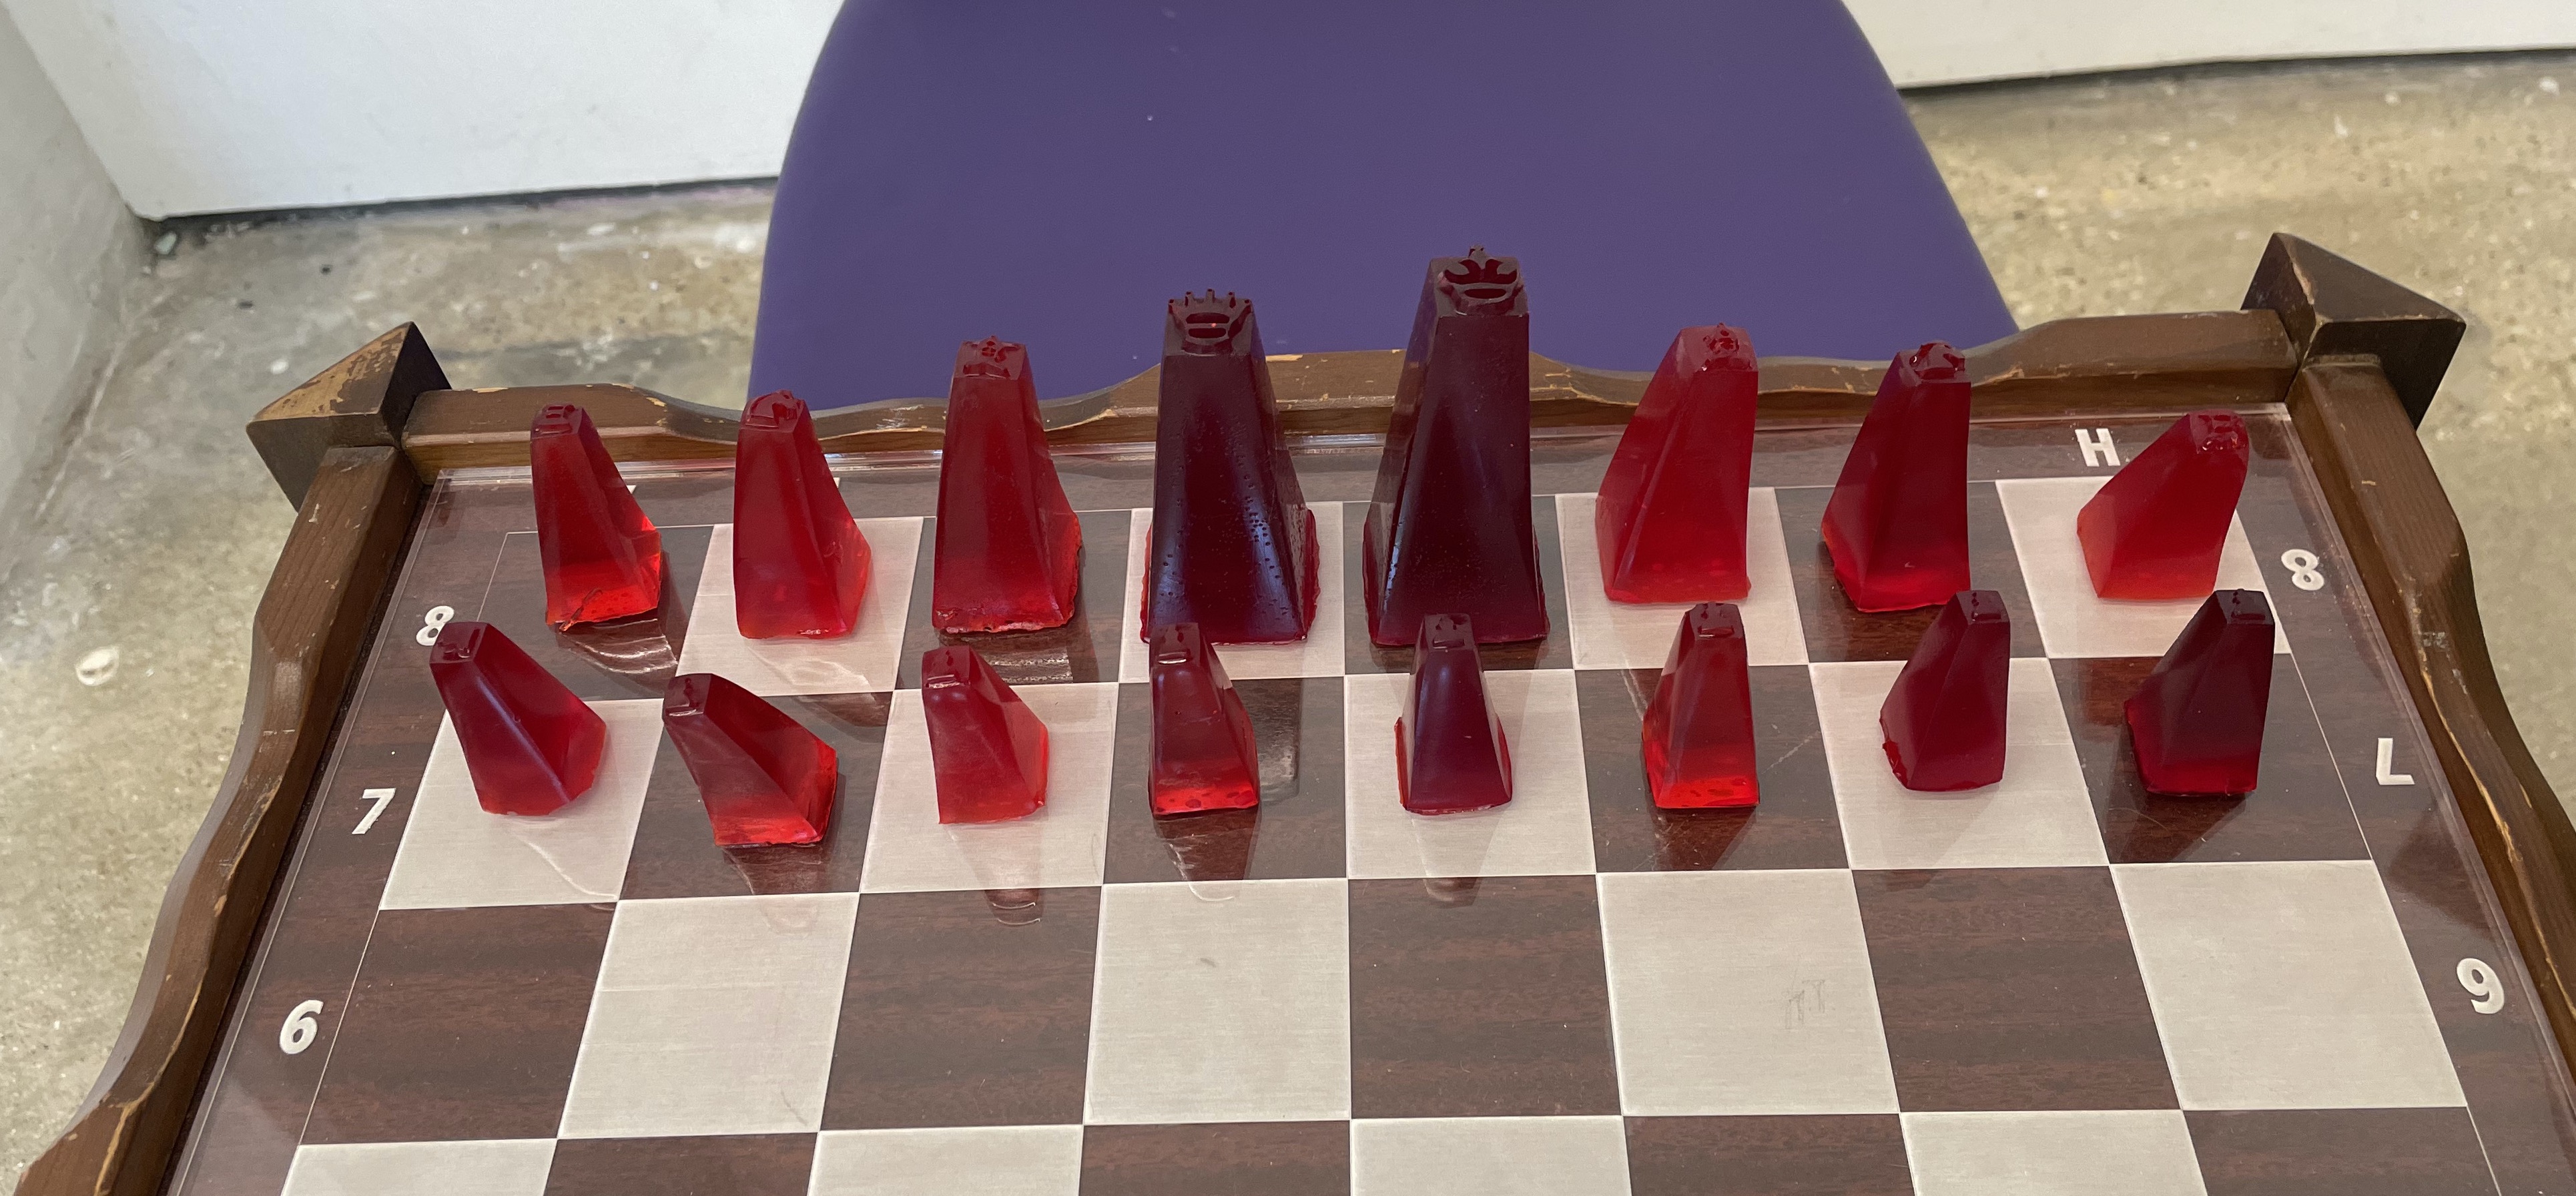
If you’re just planning on making a mold for your own uses then this is all the information you need, if you’re making a chess set there’s 2 more steps. The first is to cast a full 16 piece set in two different colors, and the second is to make a board. I looked up chess boards online to make sure the setup was correct and then made a simple grid on illustrator and laser cut the board from acrylic. I like that the black squares are set a little deeper from the raster engraving, but for a flatter finish mirror your design in illustrator (so any text is in reverse) so that your board shows on the side of the plastic that has not been engraved. I had a ton of wax at home, so I used red and black wax to cast the white and two sides. The wax they sell as SAIC resale is not a great final material for a chess set, but it’s a great way to investigate flaws in the print or the mold that may need correcting before making a mold of a full set. In my case there is a big air bubble on the rook and some small ones on the queen that I could have avoided by using a pressure pot to minimize the bubbles when I poured the silicone initially.
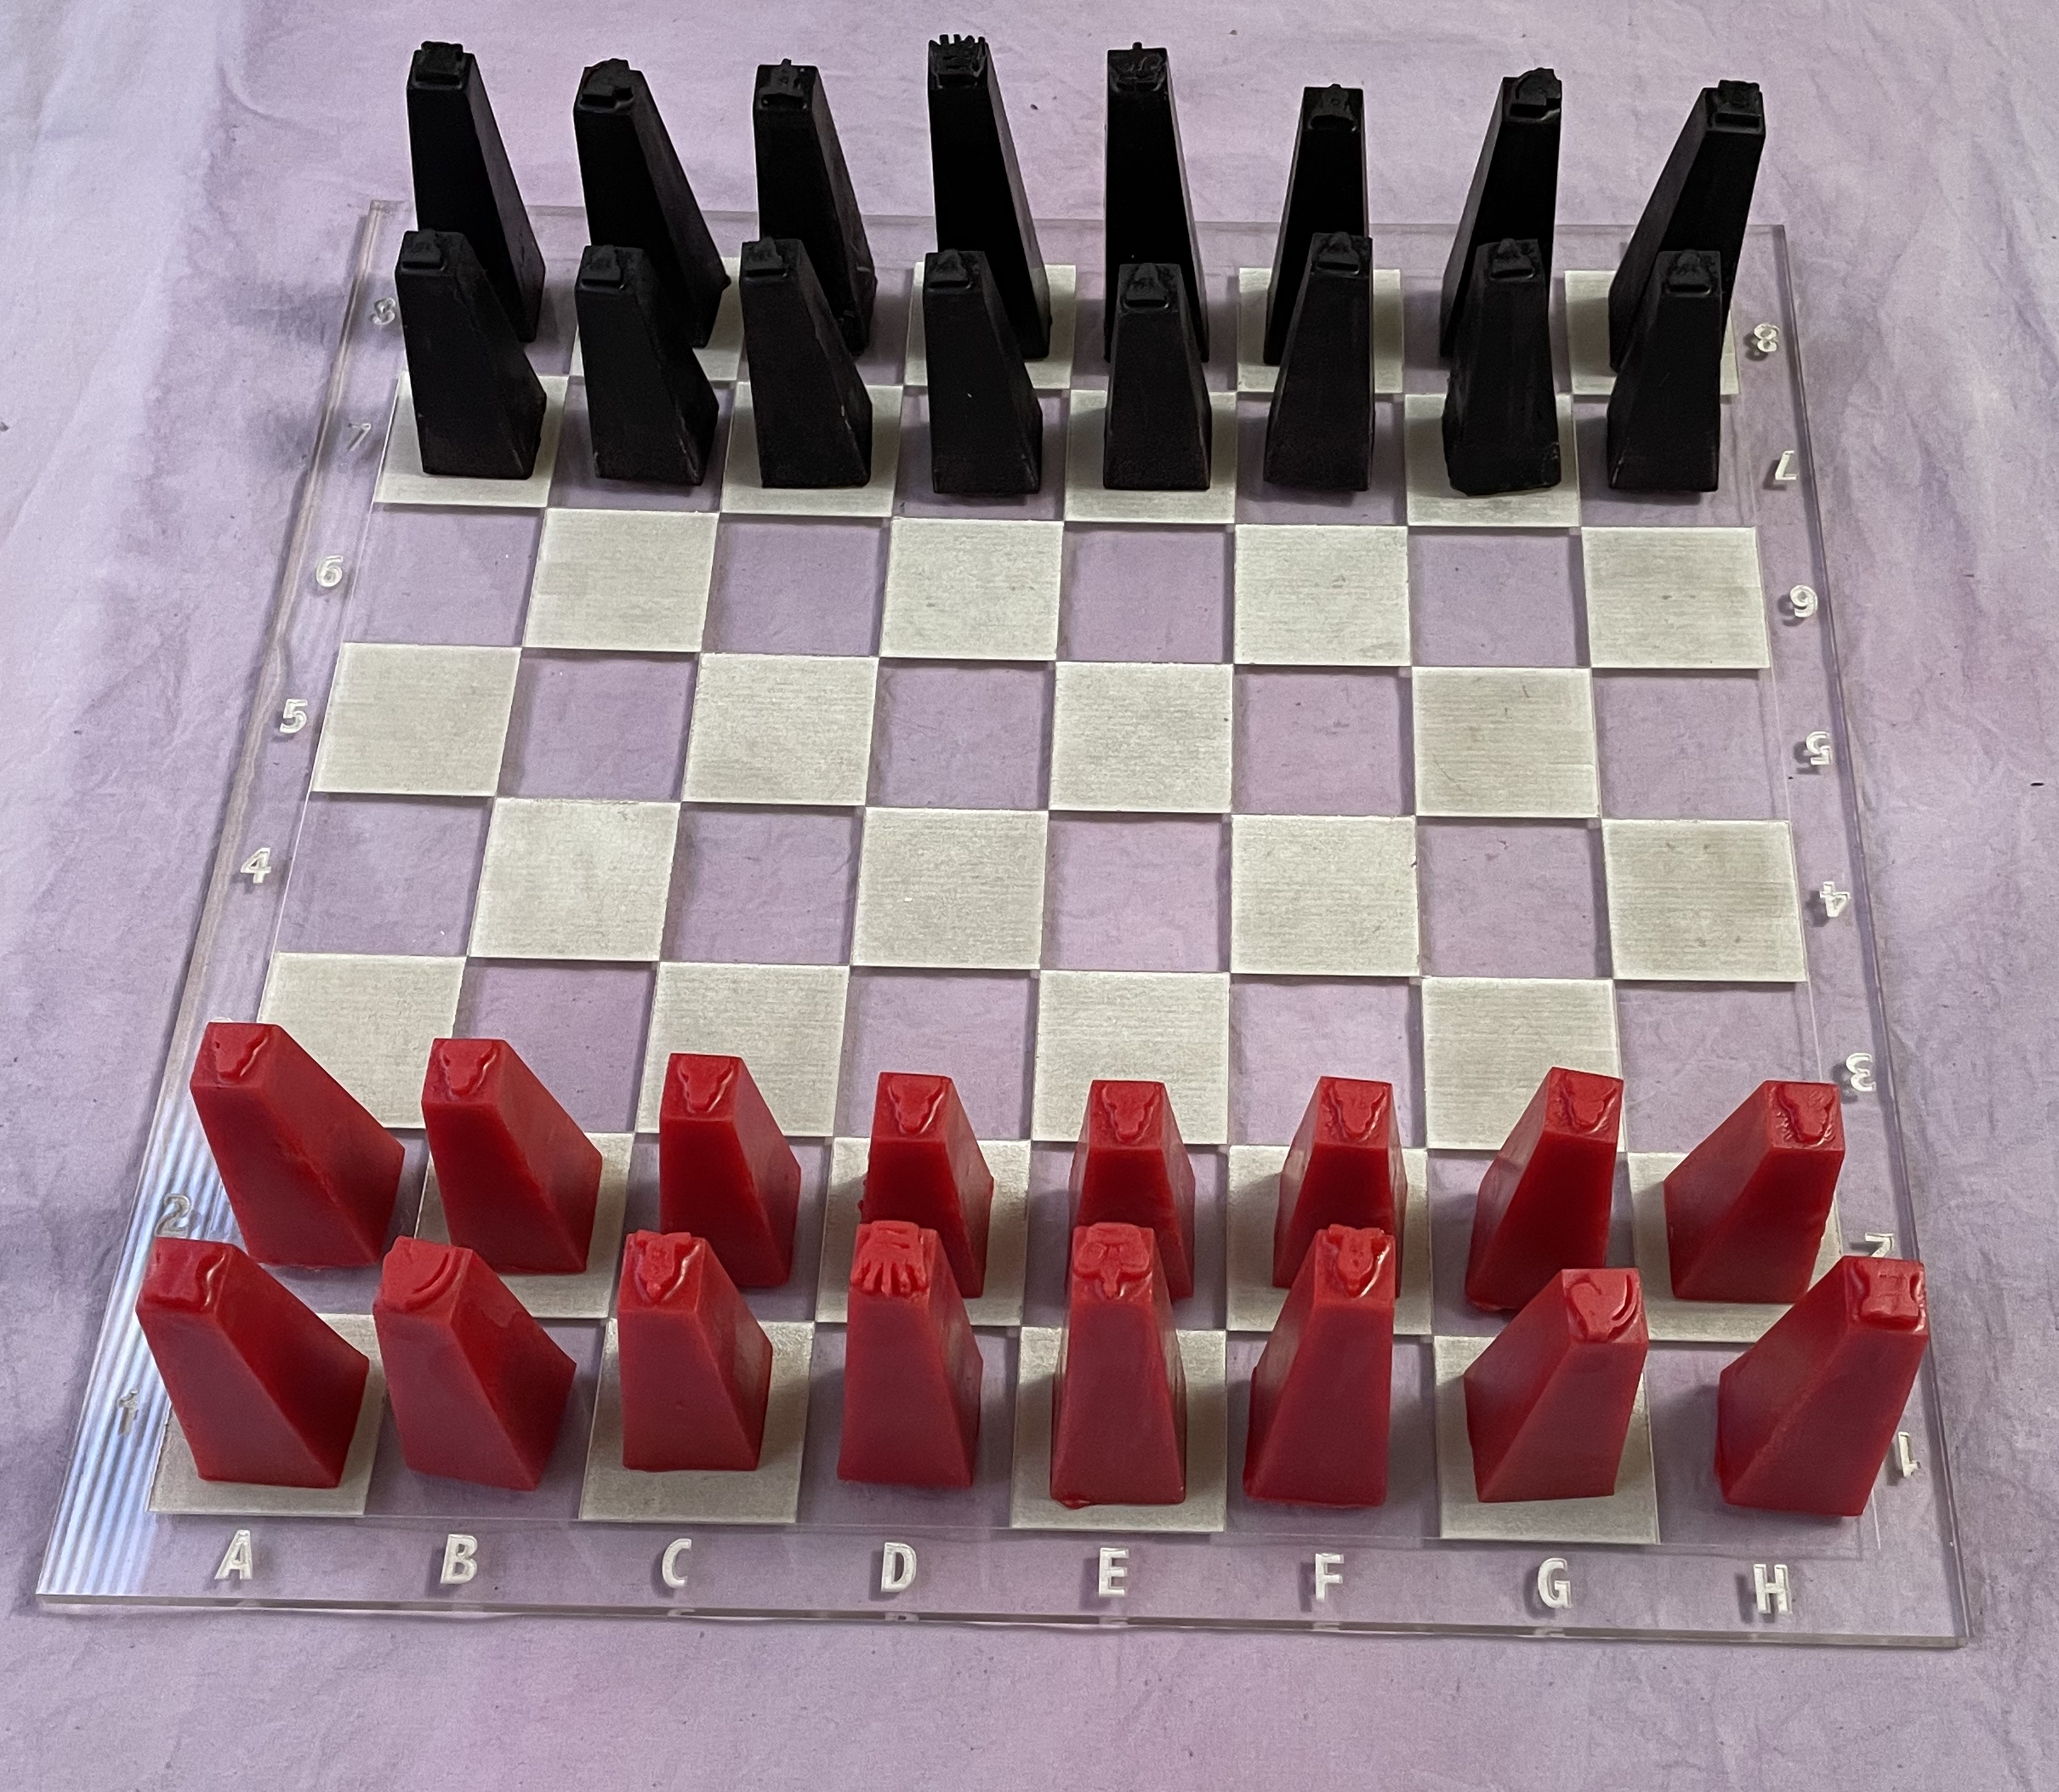
These chess pieces are not tournament size, I modernized the design for easier cleanup and easier release from the mold and put the symbols for the players on top of each piece, but I’m really happy with the result and the final cost, which is less than a ¼ of what the cost would be to print a full set of solid high resolution pieces this size. This process can certainly be done with more detailed pieces and yield amazing results, it will just take longer to sand and cleanup, in which case it may be worth spending a little extra to print your object on the Formlabs at high resolution.
And here are some resin and plaster casts, as well as a jello set I made for class.
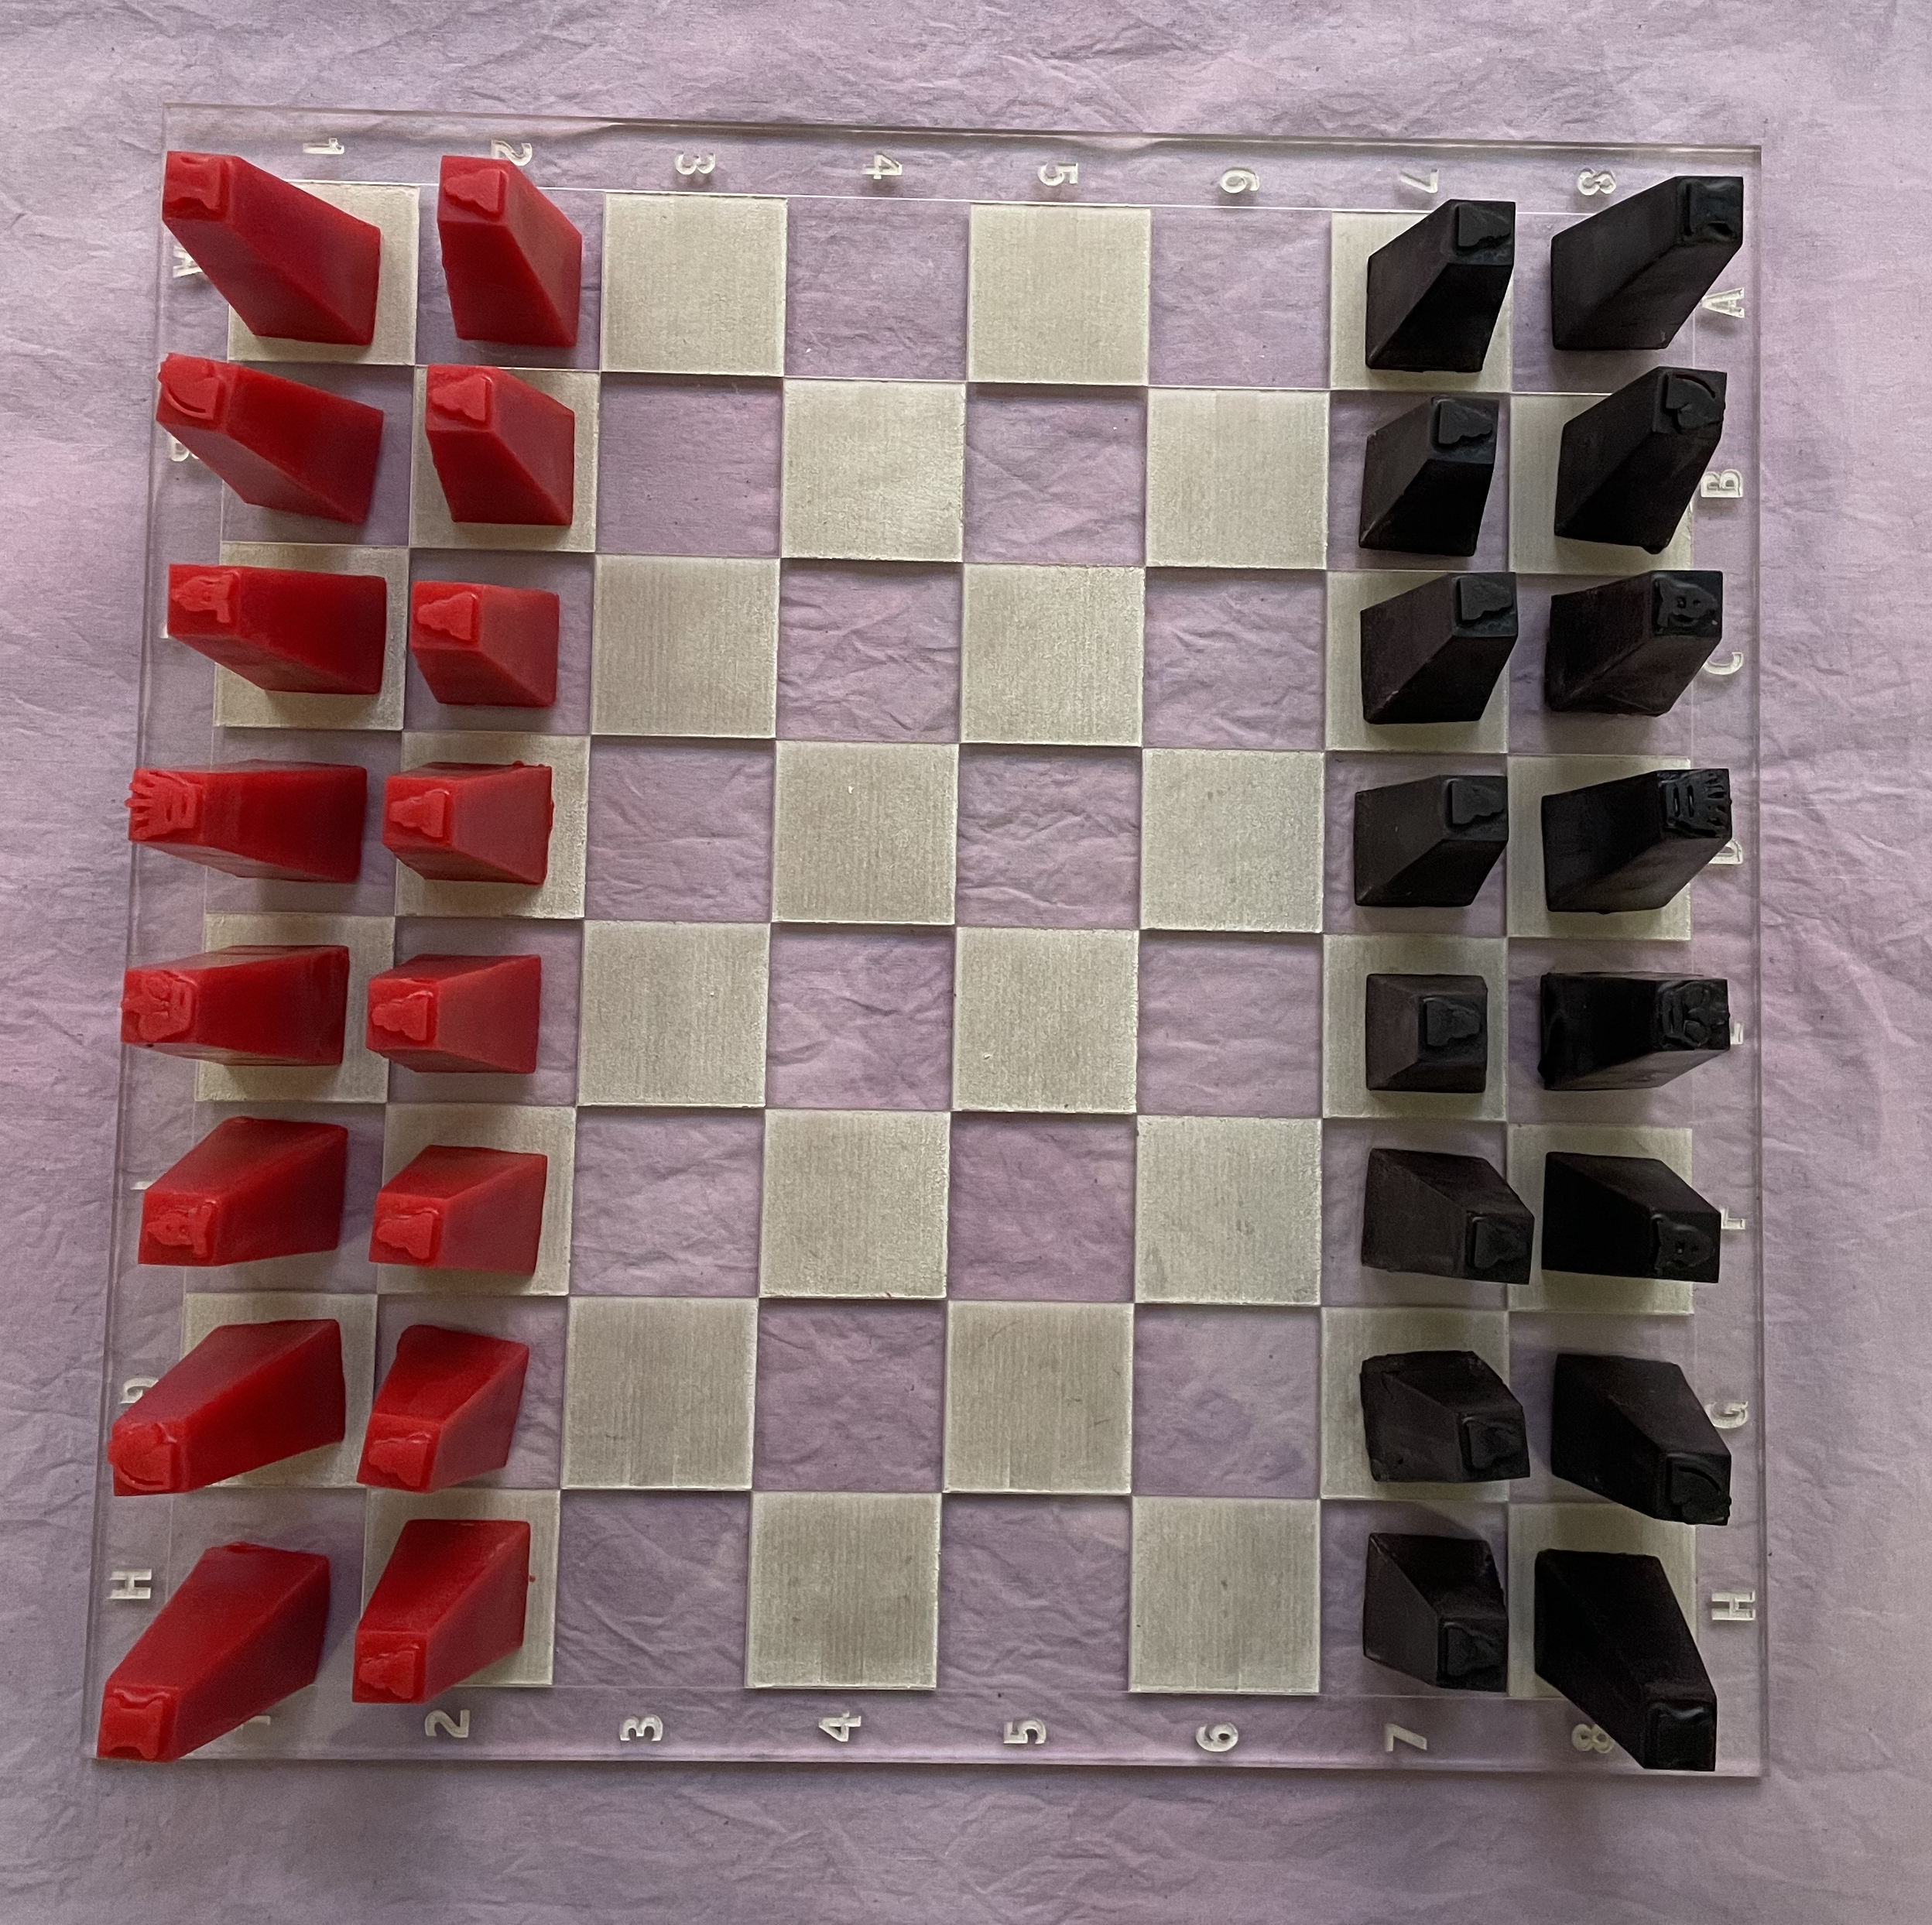
Chess sets are a really fun thing to remix and play with, just make sure the queen always gets to stand on her color!