

Written by: Charles Traut
If there’s anything I love most about laser cutting, it’s the ability to completely transform a material through the application of a few well-selected processes. One of the best examples of this is the lattice or living hinge.
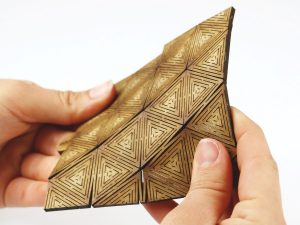
Also known as a Kerf cut, a living hinge is a specifically patterned series of cuts that allows a normally rigid material to flex. Kerf cutting can also be achieved on a saw, typically by cutting slits through most of the material, leaving gaps that allow the piece to bend without breaking. Because of the accuracy of the laser and the ability to cut all the way through a piece of material quickly, however, the laser cutter makes a perfect way to experiment with more complex and multi-axis hinges.
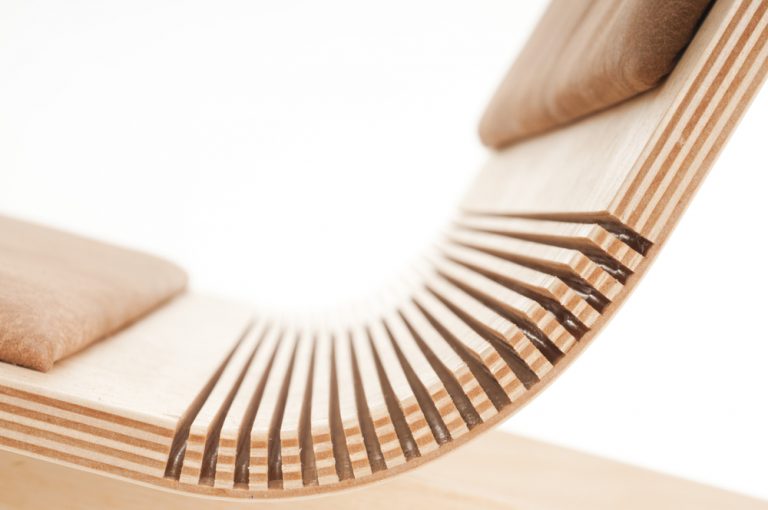
A kerf bend on a saw vs. A laser cut multi-directional kerf cut
https://www.thebasicwoodworking.com/how-to-bend-plywood/ – https://www.trotec-materials.com/material-usage-hints/bending-trotec-materials
As a bookmaker, I knew I wanted to try my hand at an entirely curved box housing. If you know anything about boxmaking, you know that bookboard/chipboard is not particularly prone to flexing significantly without breaking. I needed a way to curve a piece of bookboard without a) manually cutting small slivers and reattaching them to another piece of flexible material (the traditional way of creating curves), b) losing strength and rigidity on the y-axis, and c) creating a bumpy surface that would show once covered with bookcloth. Kerf cutting those bends seemed like a perfect solution, so I could achieve a piece of bookboard that could accommodate several different profiles while still retaining rigidity. Plus, I wouldn’t have to fuss with potentially testing out other, more bendy materials that may or may not react well to PVA and bookcloth.
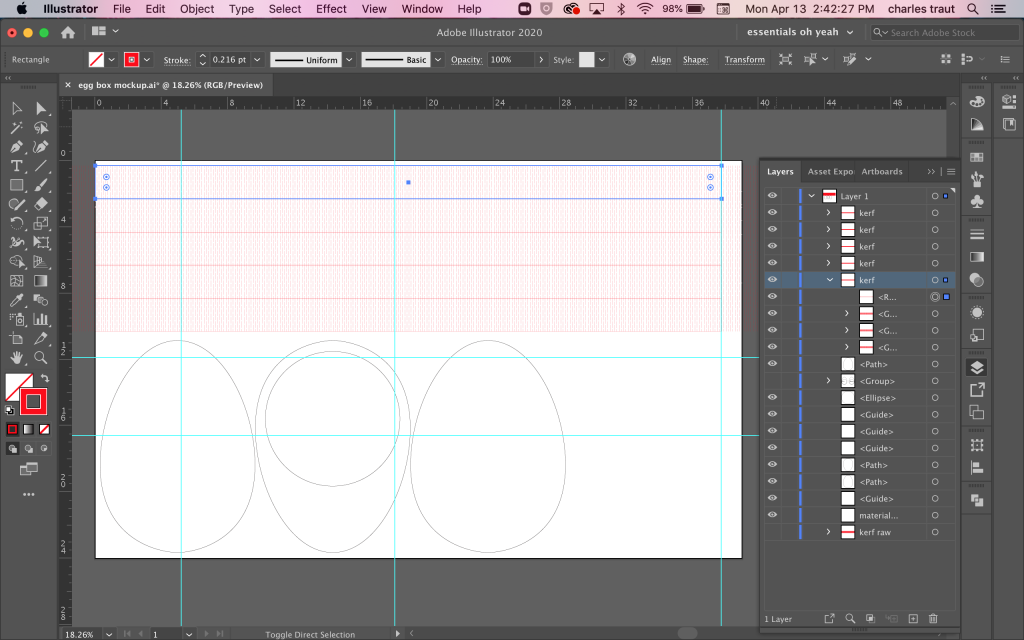
The file setup was relatively simple. I was going to be laser cutting the other flat portions of the box as well, since the bottom and top needed to match, so I had previously mocked up the box in Illustrator after sketching out the dimensions. The living hinge itself is not a unique design, per se. Since it typically consists of some kind of offset and repeated pattern of lines, you can find several different sources online for pre-made patterns. I ended up using a pattern I had downloaded a while ago, and repeating and resizing it to fit my needs and the piece I would be cutting.
So, here’s the tricky thing about living hinges. Depending on your material (and its thickness, rigidity, tensile strength, etc.) the living hinge design will need to be tweaked to achieve the desired circumference. There are ways to do this mathematically but otherwise, it takes testing and adjustment to figure out how to suit the design to your needs. You can elongate the cuts themselves, or space them out closer or farther. You can shift them tighter in some areas and leave other places sparse or totally untouched. This all affects how the material will ultimately bend.

I ran the job in two sections – first the flat pieces of the box, then the living hinge, since I knew it would take a while for the machine to complete it
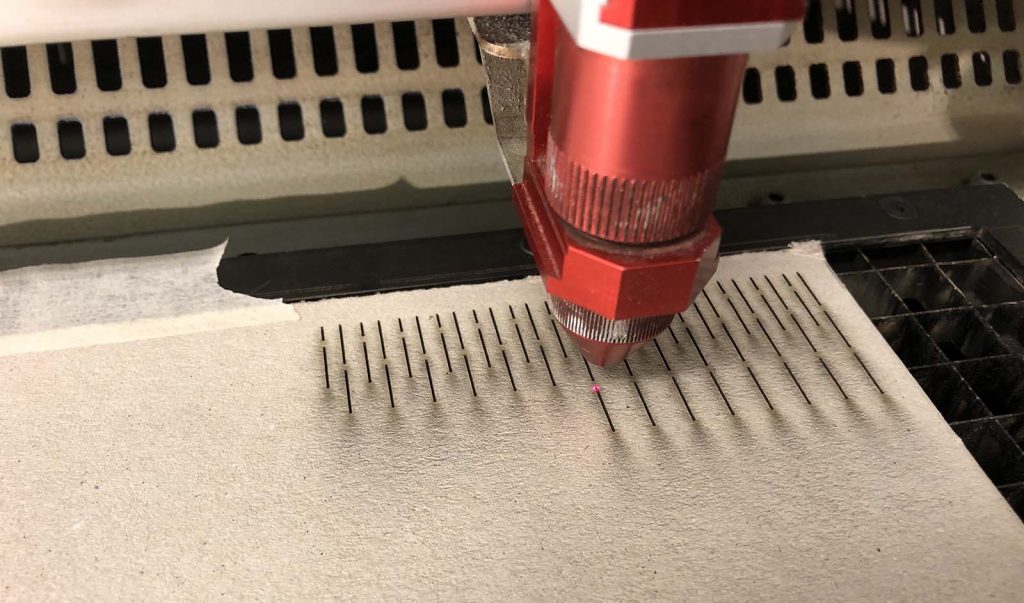
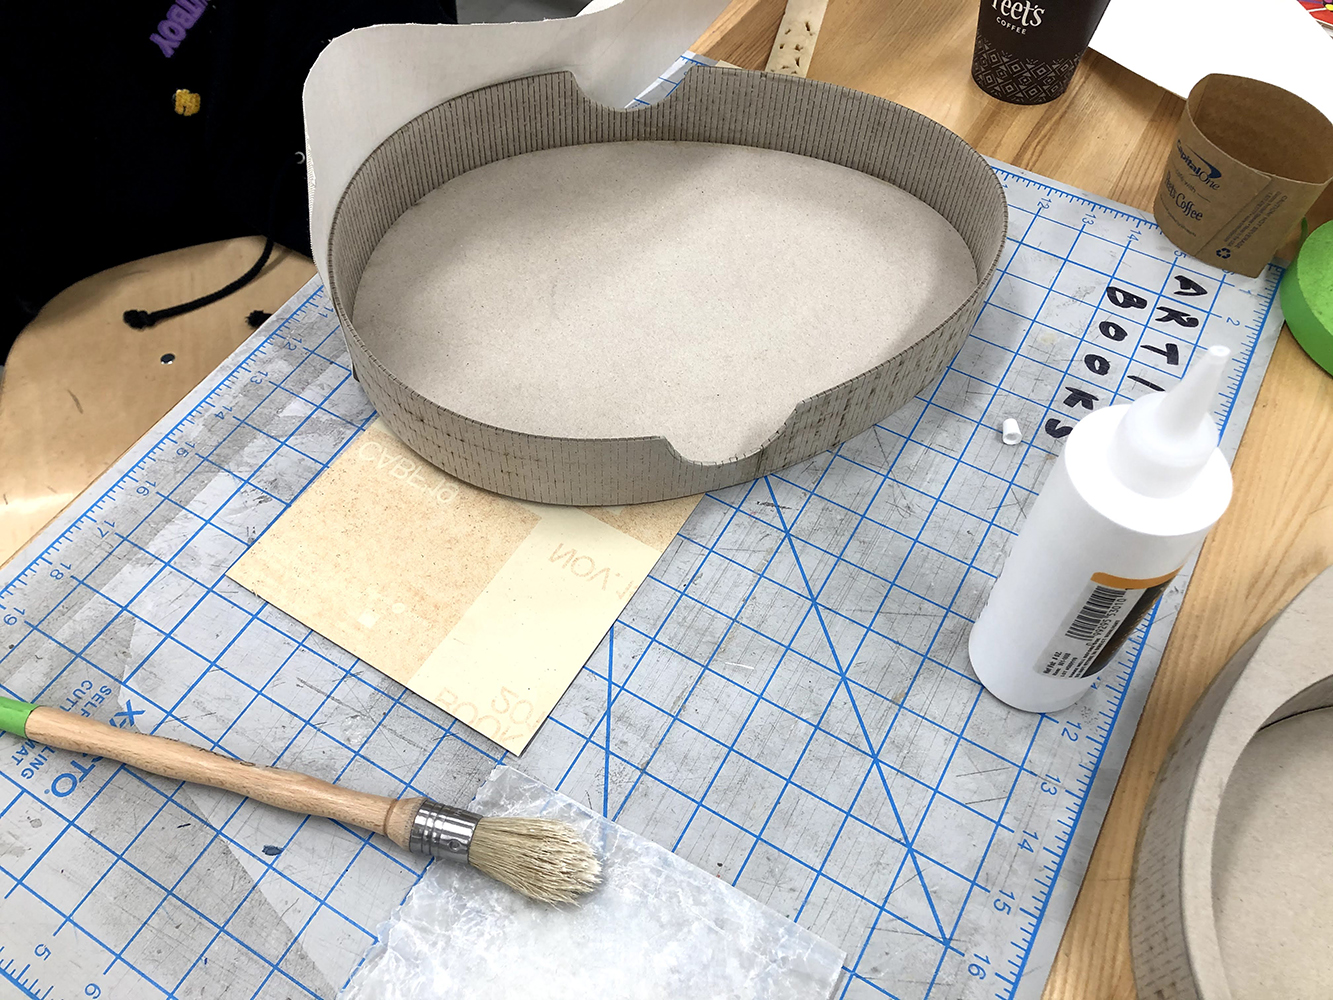
I knew for this project I would need a pretty tight, malleable curve – I’m embarrassed to say I did little testing here on the design. Knowing it would allow for more curvature, I pushed the cut lines closer together, and made them fairly short. Thankfully, it worked wonderfully on the first try! Despite not testing the design, I did test the laser power settings to make sure the board cut through all the way in one pass (if you’re unsure how to run a test cut or change the power, ask a staff member and they’ll set you right up). After this, I ran the job, and was left with my pieces. I made several excessively long strips of living hinged bookboard, that way I could glue and cut them as I shaped them into and around the box.
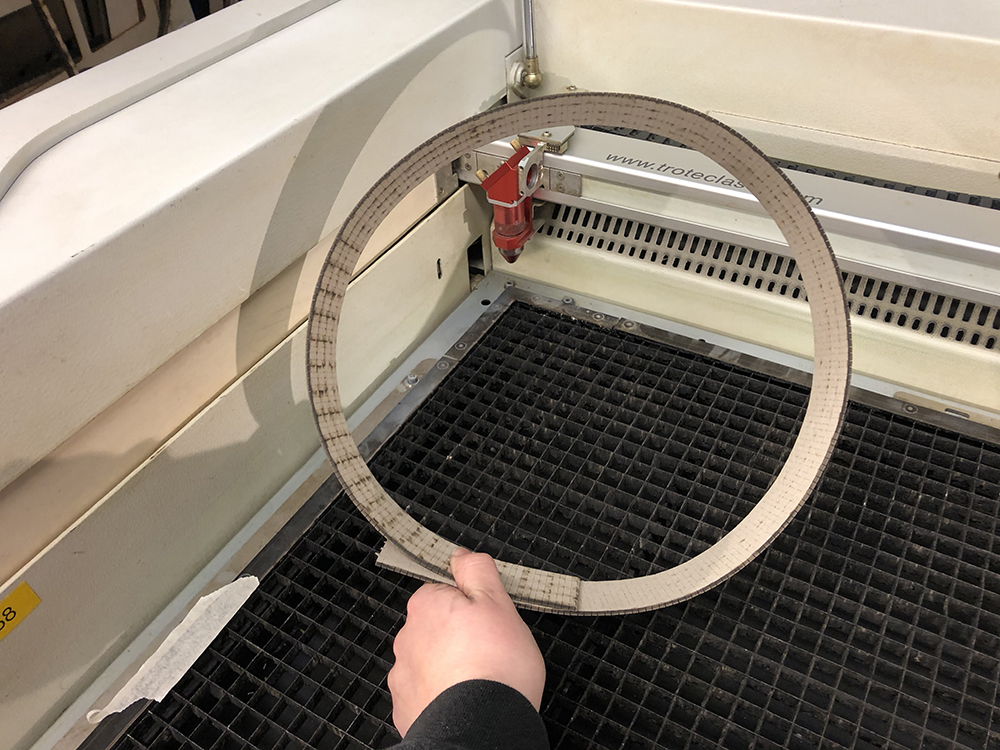
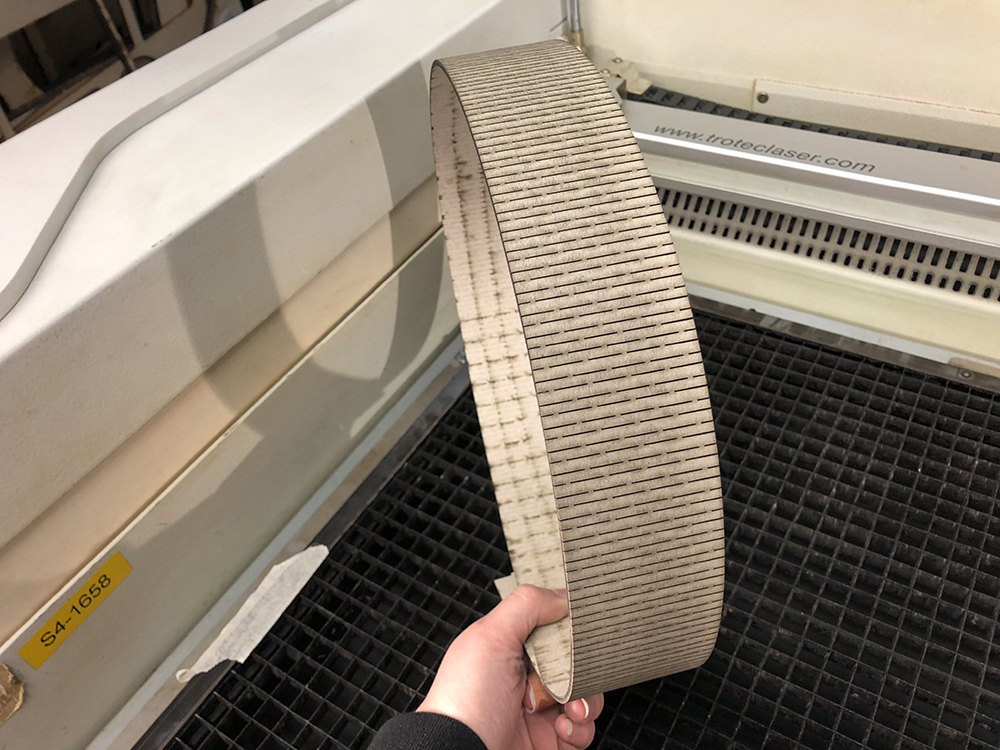
A freshly cut strip o’ hinge
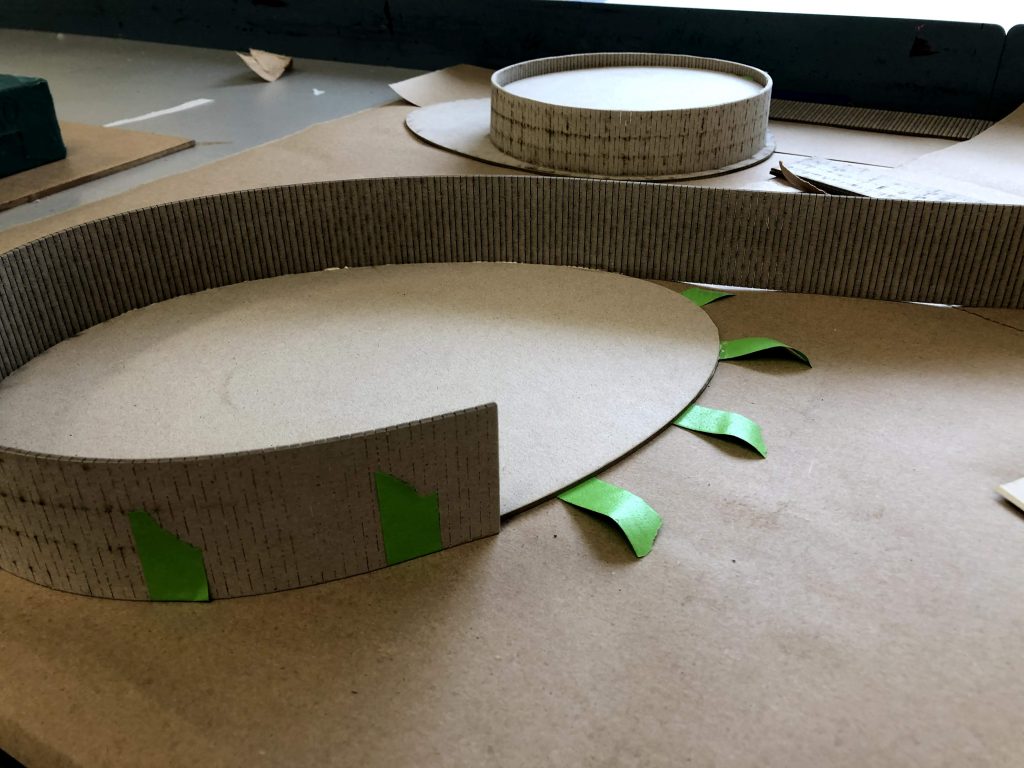
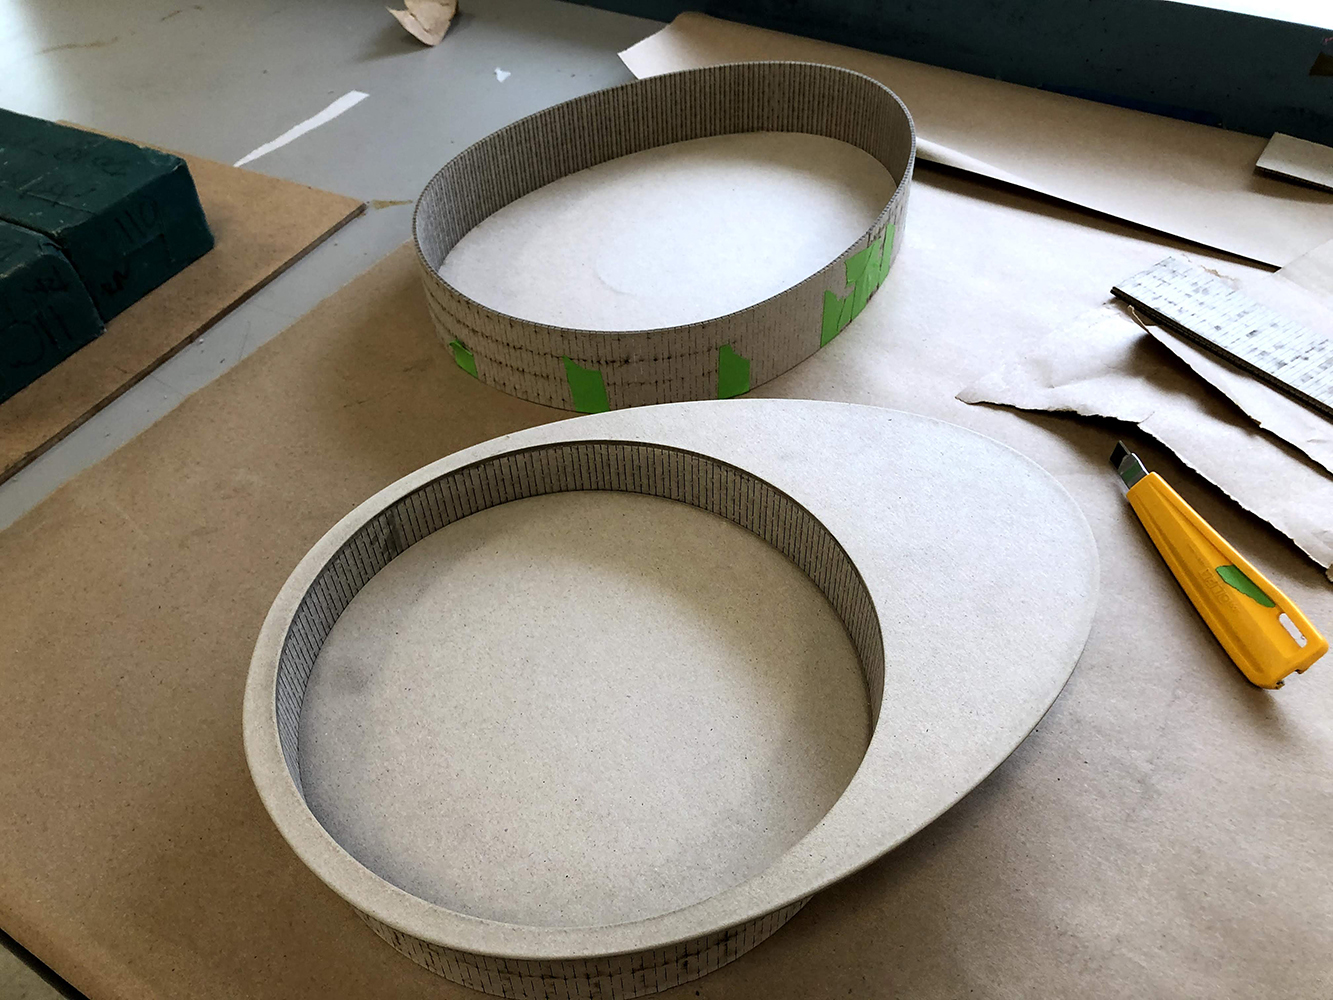
From this point on, it was all assembly. All of the pieces were wiped down with a dry cloth to remove excess laser burn, sanded, cut, and dry-fitted. I glued everything inside out, beginning with the interior cavity and moving my way out to the interior, then exterior sides. Everything was fit in relation to each other – that way, the profiles and tolerances matched as I went along, and I was not left with huge gaps or tight spots.
Beyond this was the application of the bookcloth, which I won’t get into here, but I mostly followed regular box-covering procedure, but with a curve. Corners were cut and overlapped, working inside out and always hiding the corner work with the larger areas of cloth.
All in all, this was a great project to embark on, and something I hadn’t seen done before with our laser cutters at SAIC. Although I’m not the first to utilize living hinges in this way, it seemed like an easy workaround for what would have otherwise been a herculean task.
Charles Traut
AOC Lab Specialist
instagram @thesorou