Written by: Jack Wilson
The Trotec laser cutters available at the AOC are great for cutting and engraving flat material. With the help of the rotary attachment, the laser cutters can also be used to engrave onto the sides of cylindrical shapes like cups, dowels, or wheels. It does this by turning the Y-axis into rotational movement, turning the material while it engraves. Through too much trial and error, I became comfortable with the rotary attachment, engraving onto glass, and the challenges that both presented.
To start, I used a cylindrical clear glass cup with the rotary attachment. My first design was supposed to be a little bit of practice that would help me get comfortable with the attachment. Masking and setting the glass in the rotary attachment went smoothly. My first cut seemed like it would be a success. My design, however, was flawed. I learned the damage vector engraving could do to the surface of glass. The lines were hard to clean and surrounded by tiny cracks on the surface. Some of my lines were also packed too tight and caused larger cracks, which led to the glass shattering after minor use.

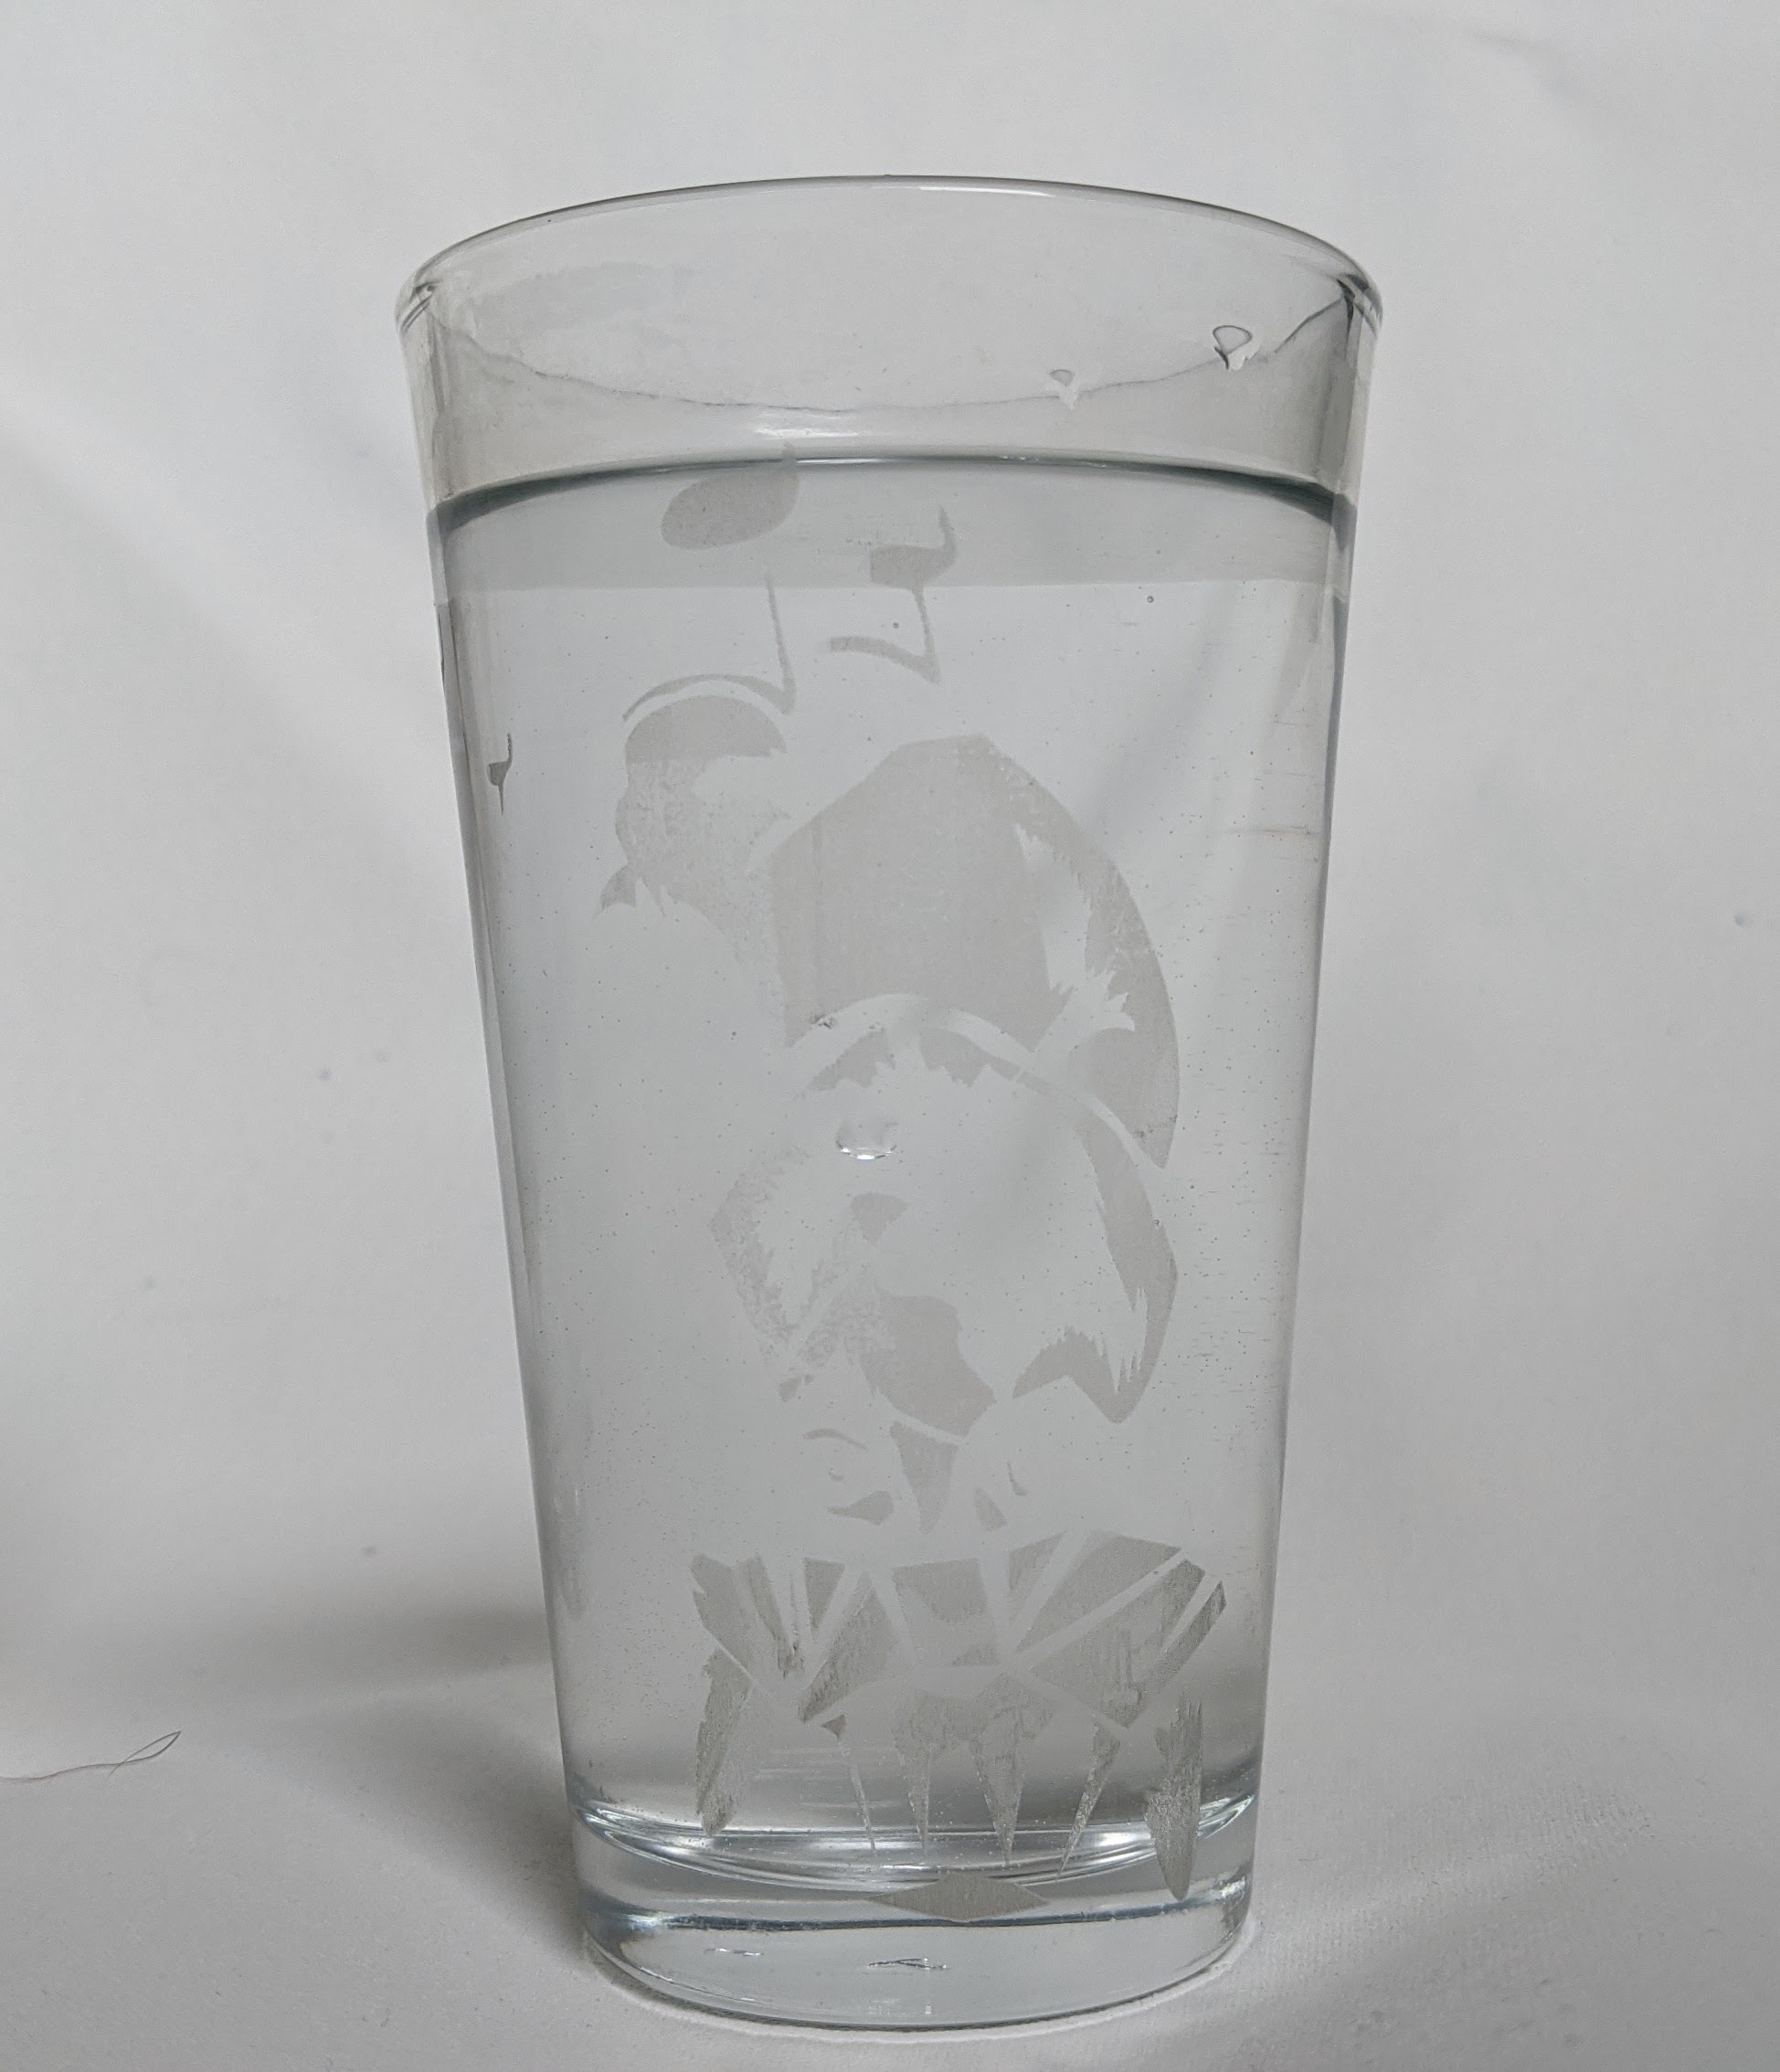
My next design was meant to use a mix of vector and raster engraving, but I was sure to change everything to be raster engraved after seeing what happened to my first cup. I was also using a tapered glass this time, so I had to adjust the attachment using the arm on the far left of the rotary tool to make sure the laser cutter would stay focused on the face of the glass. I flipped the cup during this process, but didn’t flip my design, so my glass ended up with an upside down corgi engraving. However, the engraving came out much cleaner this time, and did significantly less harm to the surface of the glass making it easier to clean. The only issues was an inconsistent texture on the engraved shapes caused by uneven masking, and the warping from the shape of the glass. Thanks to the corgi being upside down, it’s easier to show how the tapering causes the design to pinch near the smaller base.
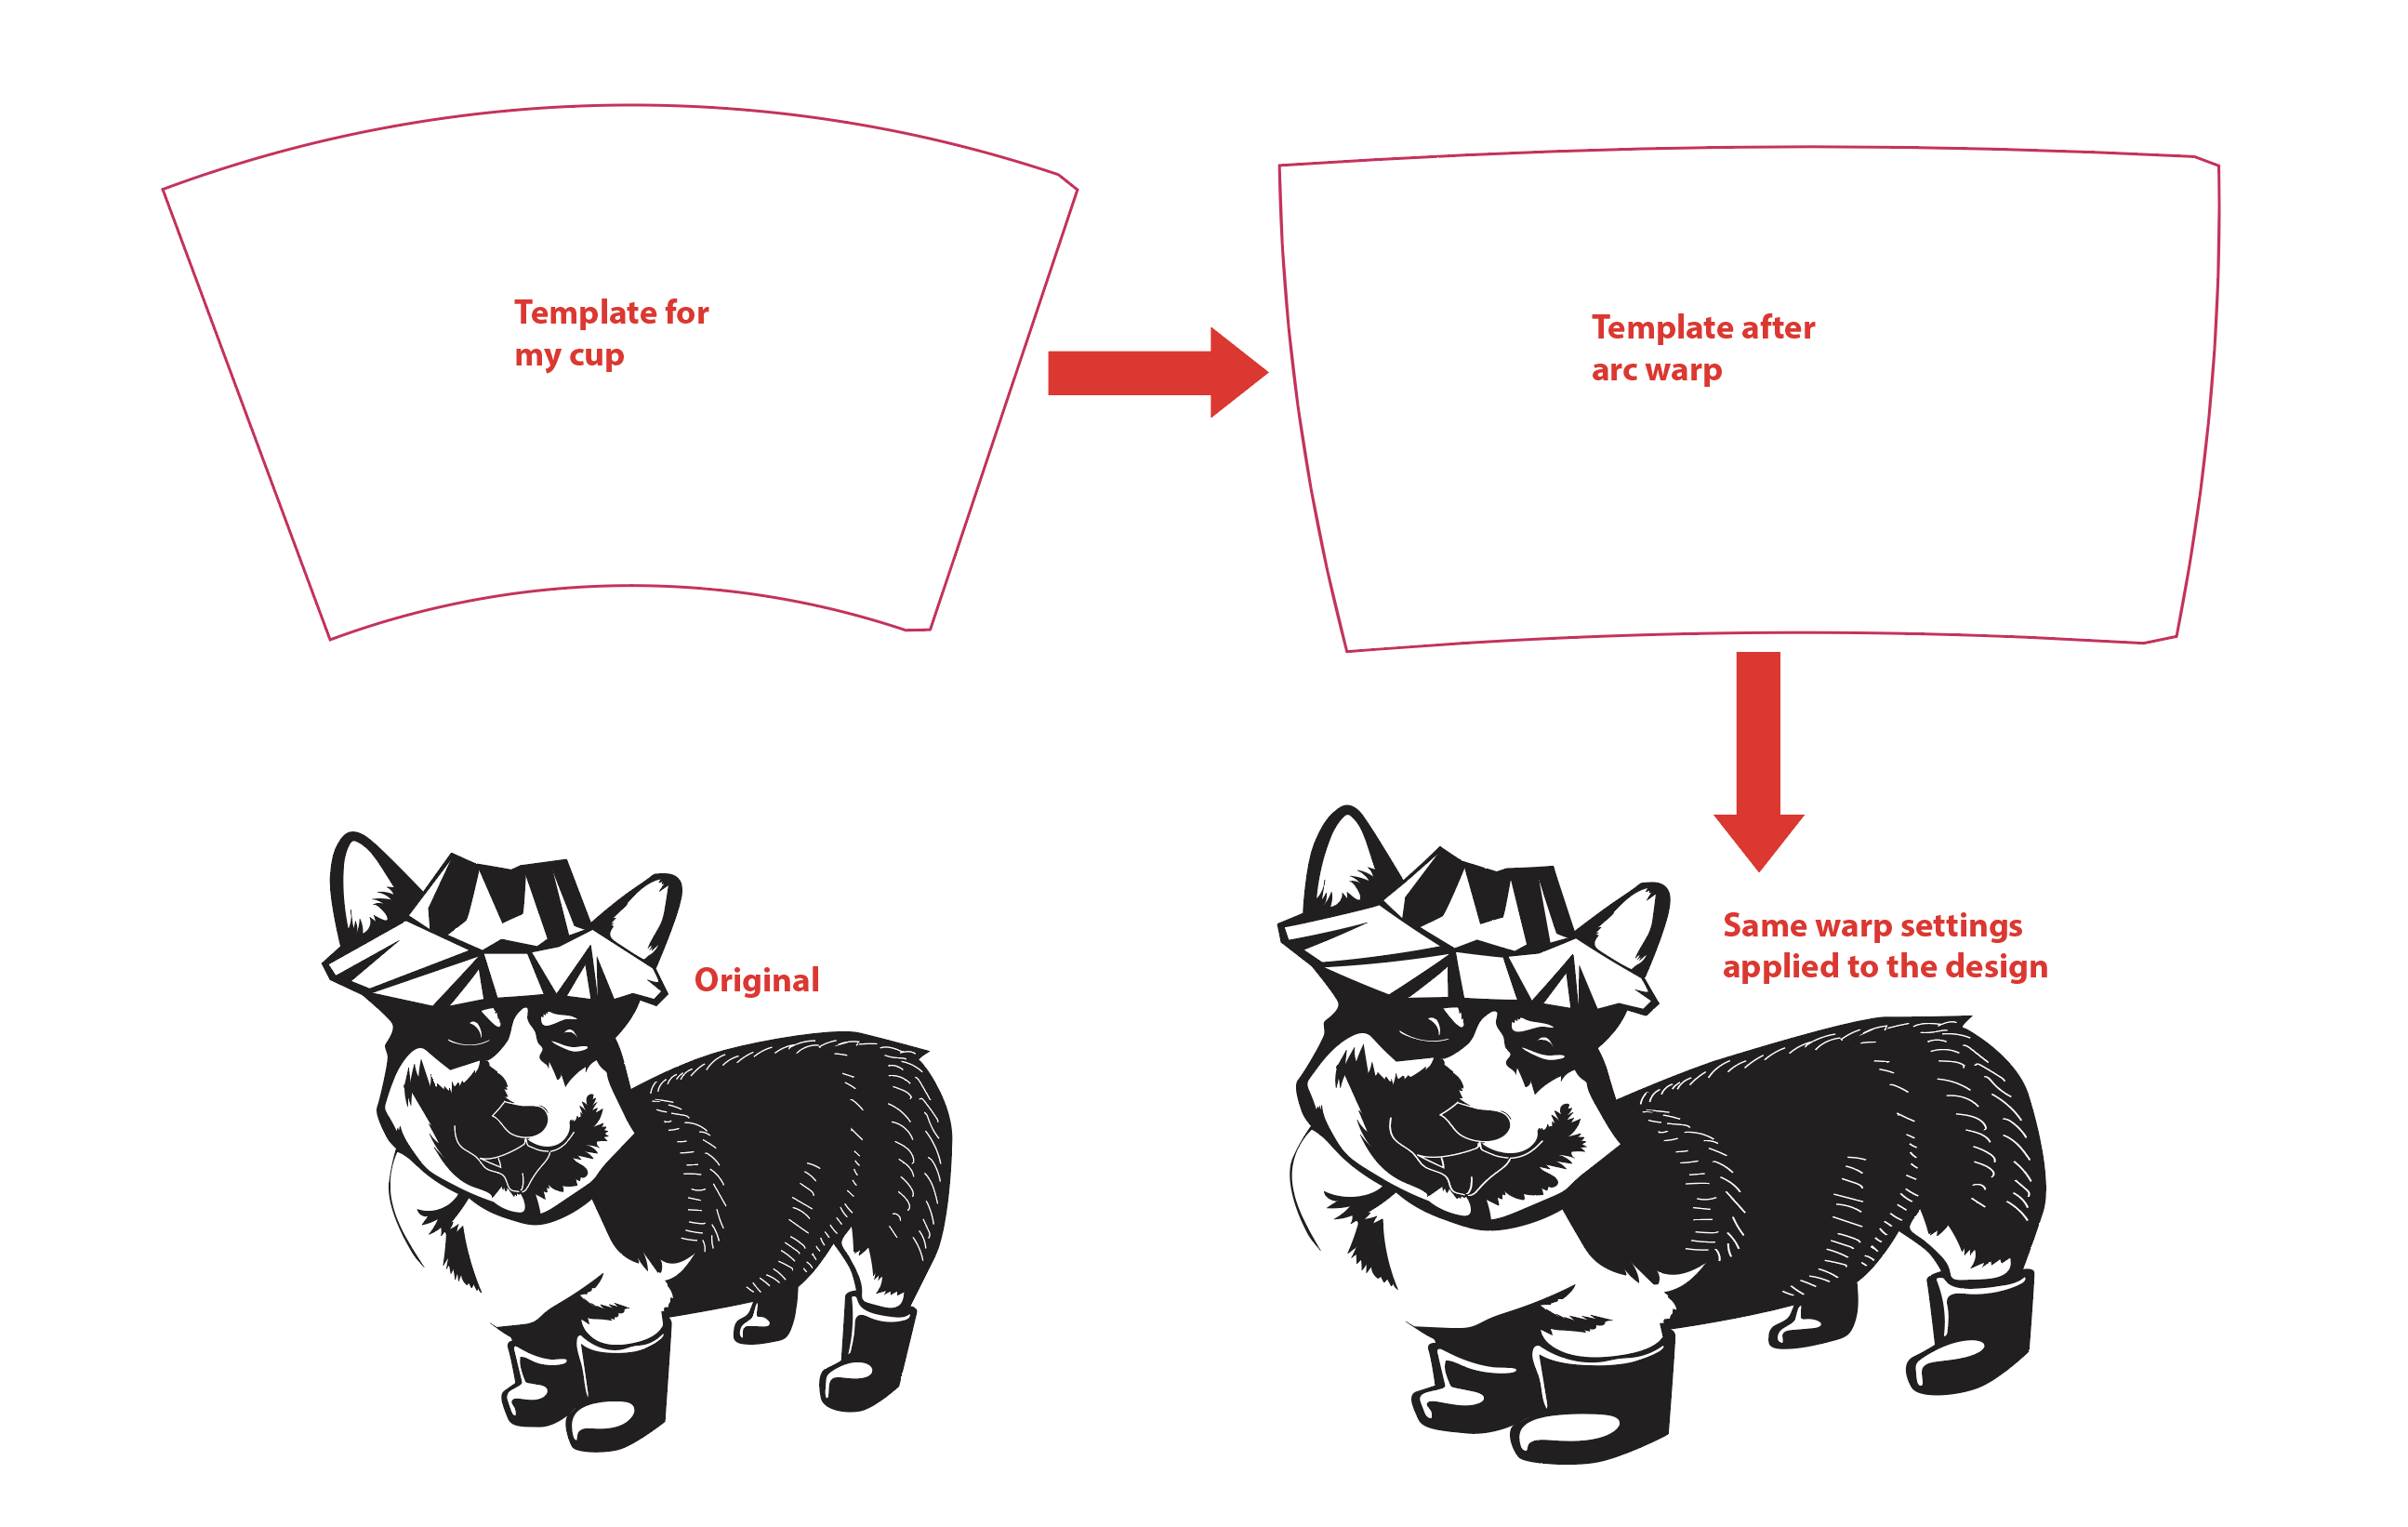
The pinching happens because my tapered glasses are really cone shaped. A cylinder’s side, when flattened, is a rectangle. If we do the same flattening to the sides of my cups, they make rectangles that have slight arcs.
So, when the rectangular design from illustrator is engraved onto the tapered cup, distortion occurs. In order to counter this distortion, I fought fire with fire, and distorted my designs using the warp arc tool.
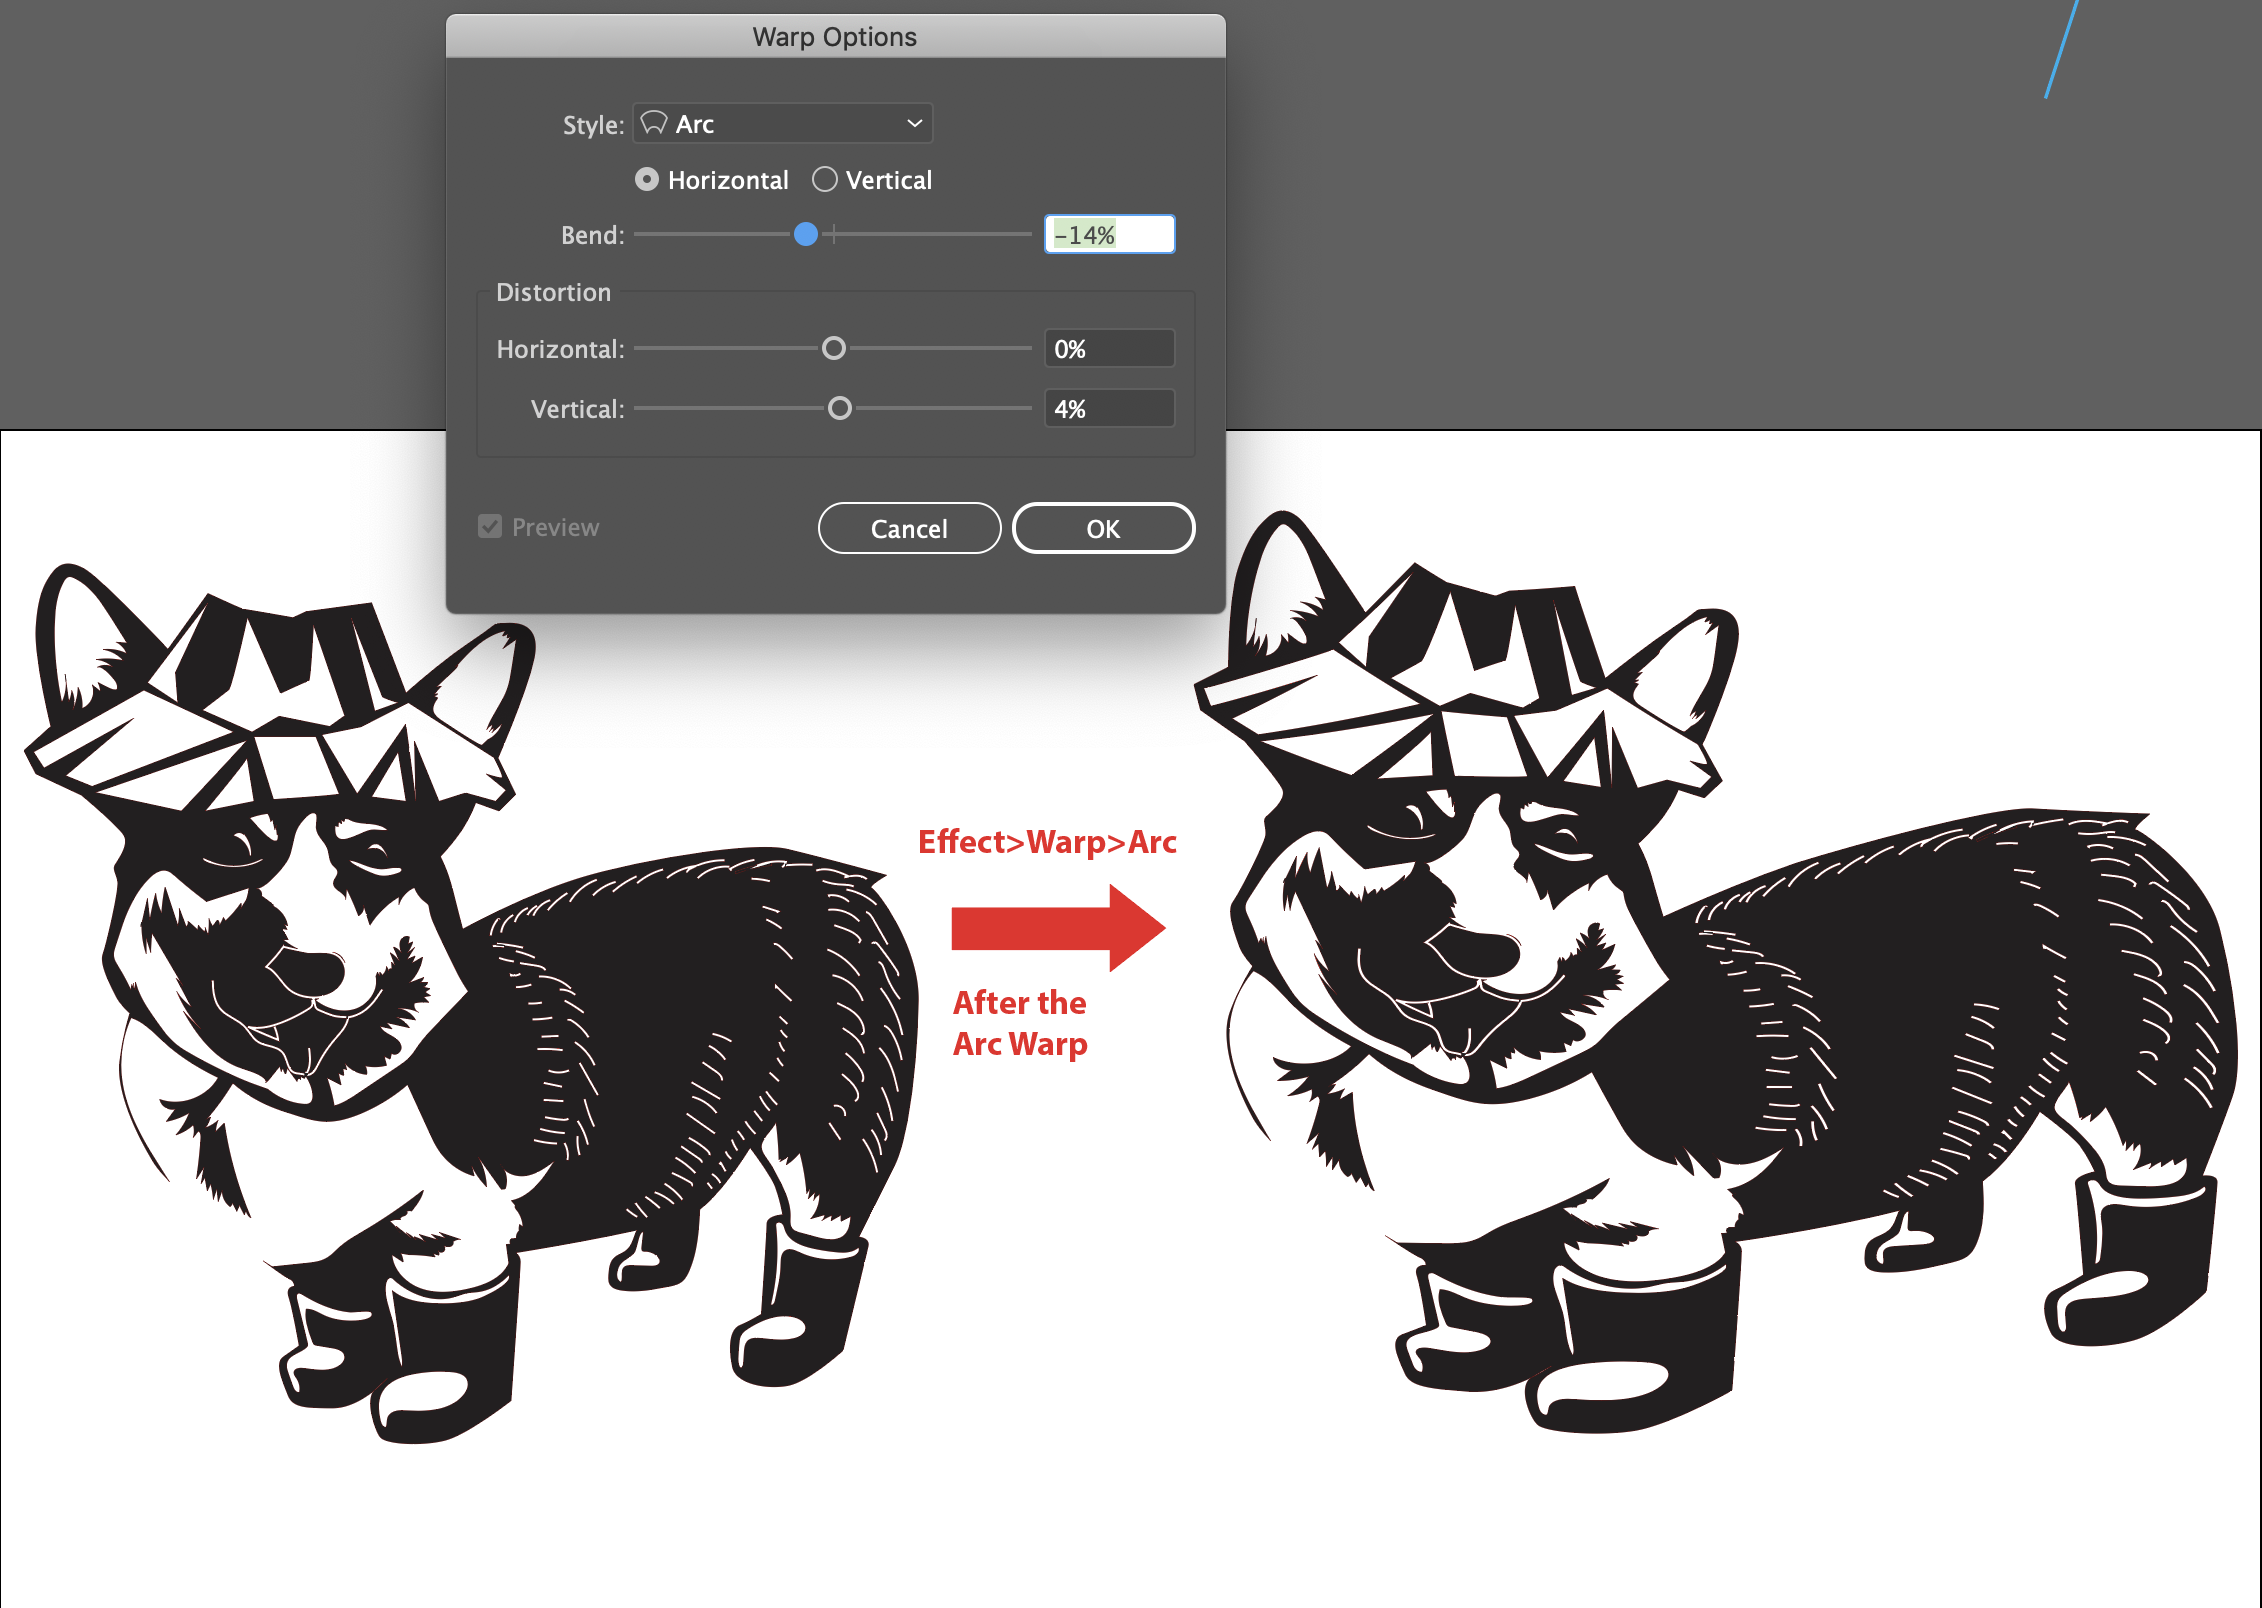
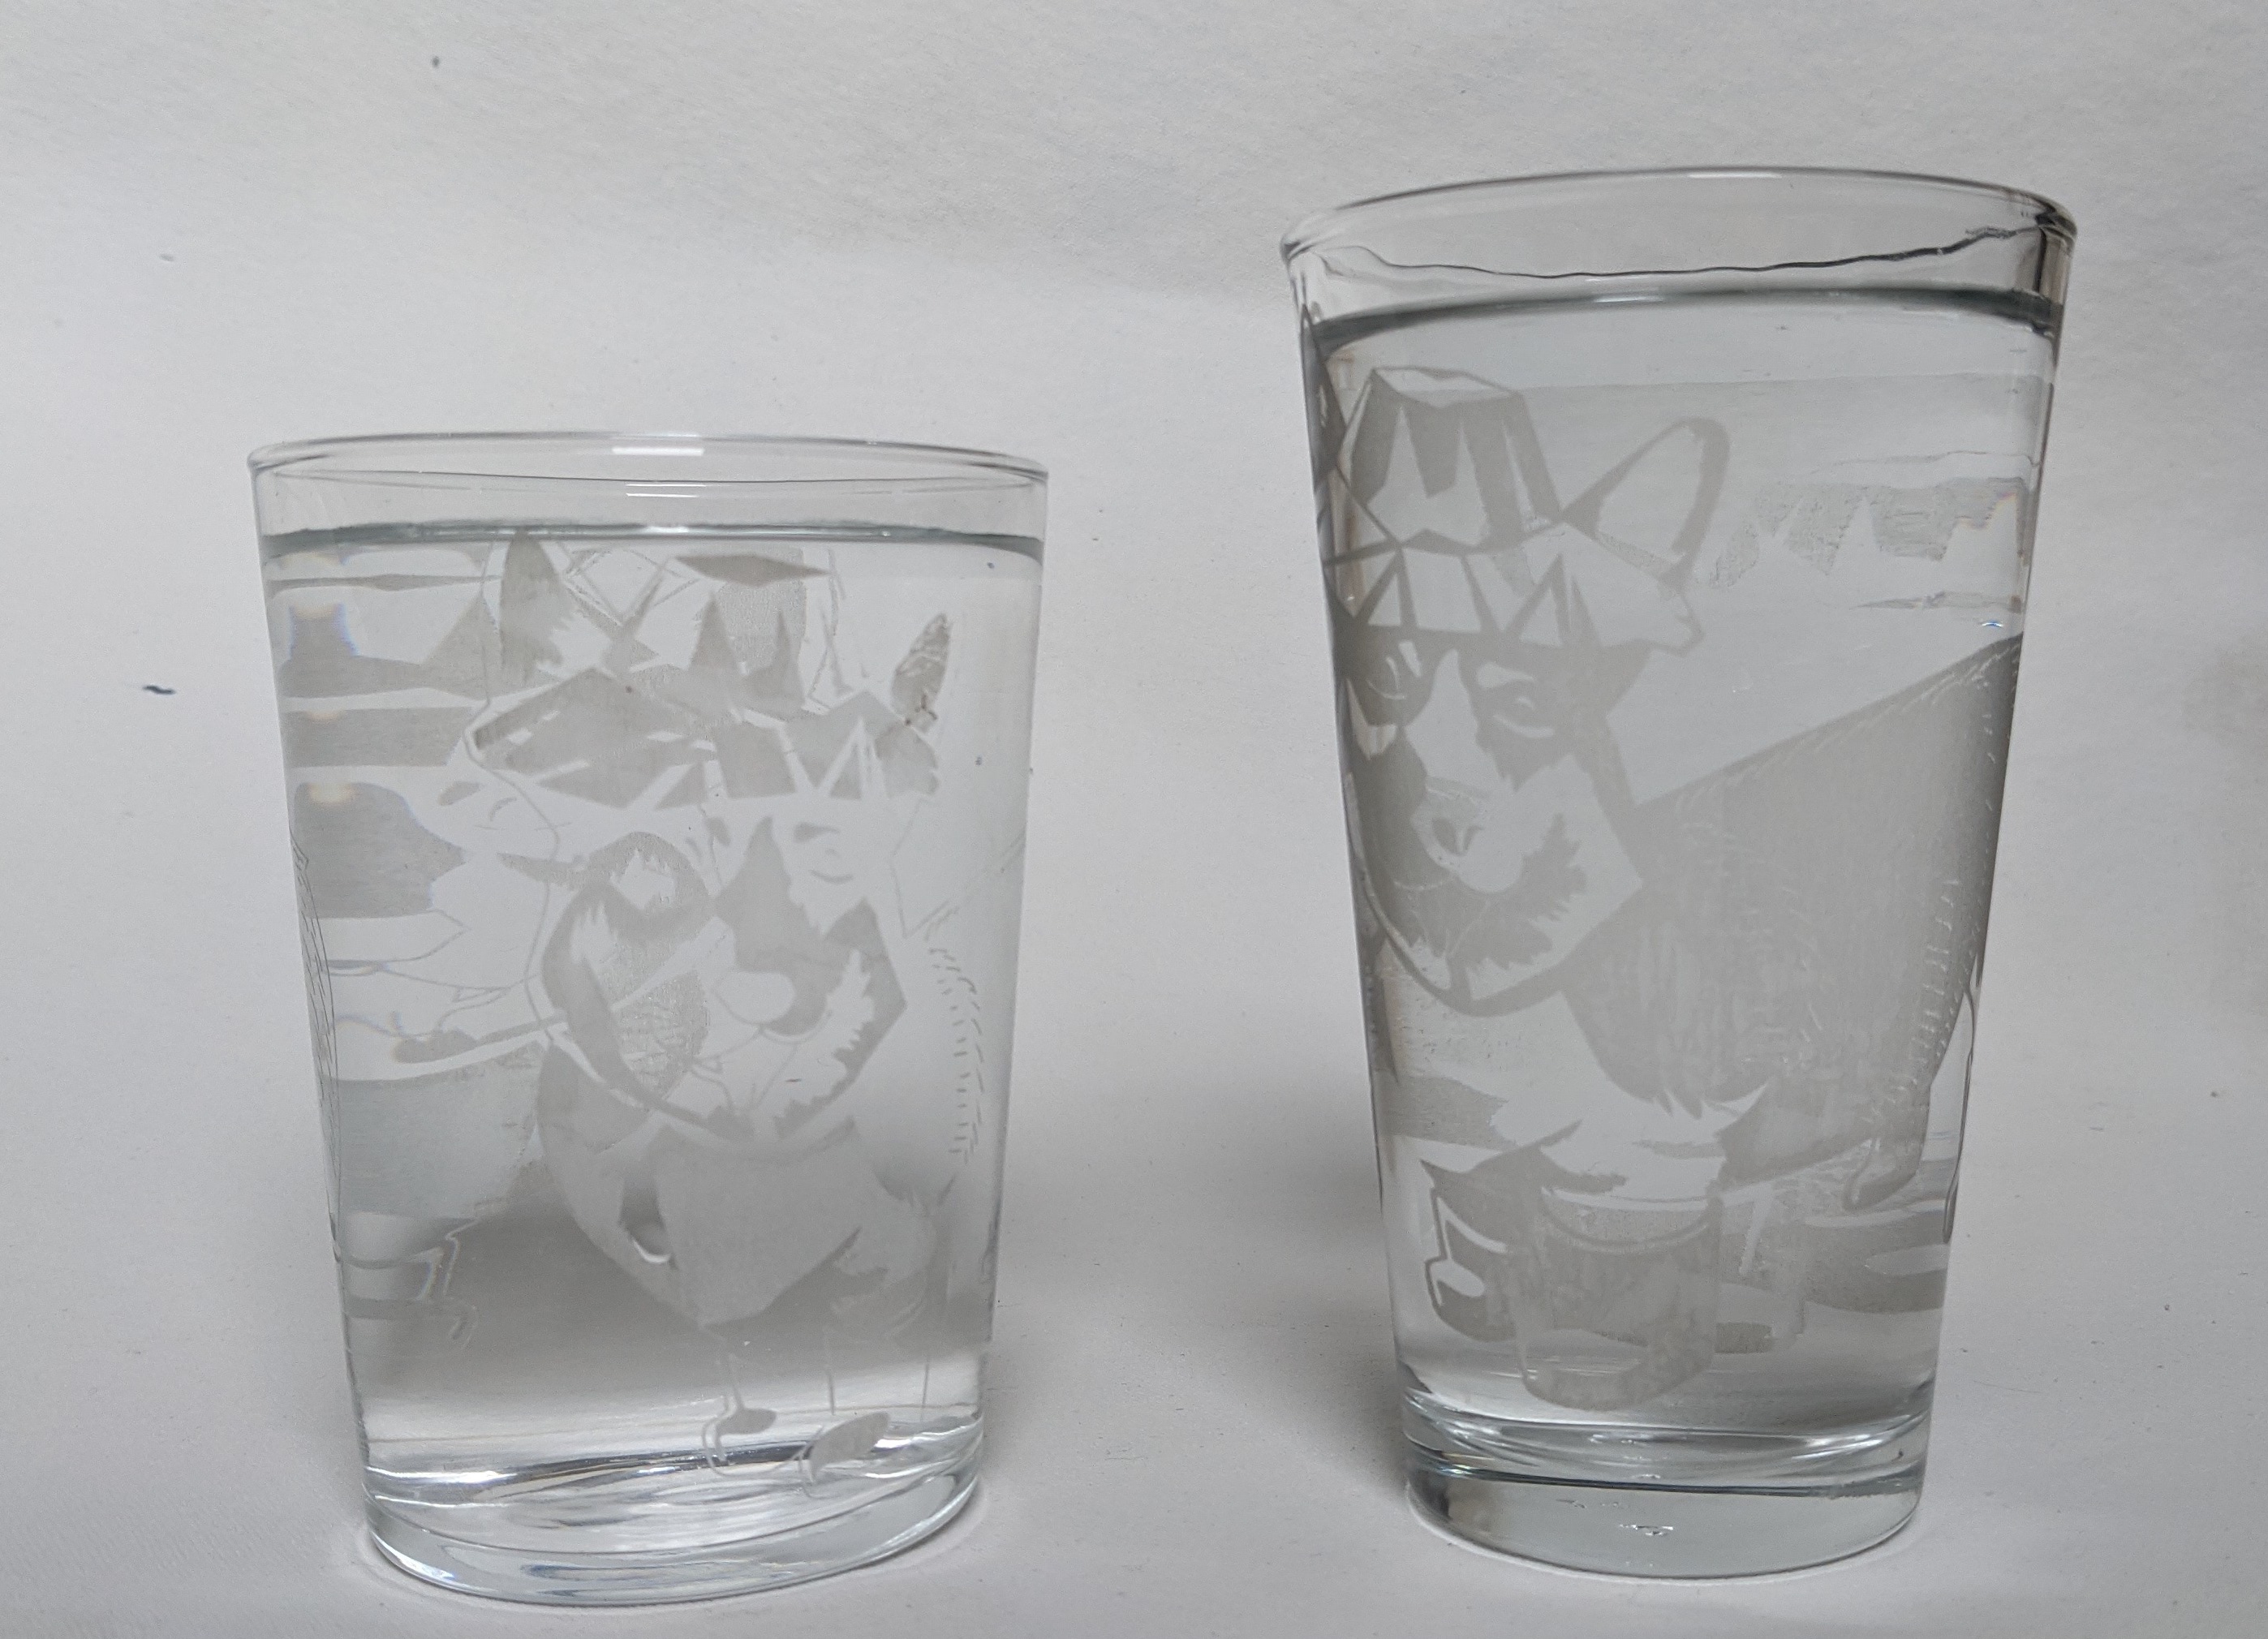
This worked great, and I finally ended up with a proportionate engraving. I did the same process on a smaller glass that had the same taper angle too. Since that one was shorter, I lowered the effect of the arc warp.
Generally, if your object’s top base and bottom base have large differences between their circumferences, there will be more distortion to counteract for. If there is no difference, there will be no distortion. To get an exact idea of how much to counter-warp the design, I recommend use an online tool, like templatemaker.nl or blocklayer.com, to get a quick image of what your material would look like flattened out, then open that image in illustrator and use the warp arc tool to straighten the arc. Apply those same warp settings to your design and it will be ready for engraving.