Please see instructions below for selecting double-sided printing option when sending to laser printers on campus.
Note that there may be slight variations depending in the application used.
| Option A: Print Dialogue When printing from within a Desktop application: | ||
 | 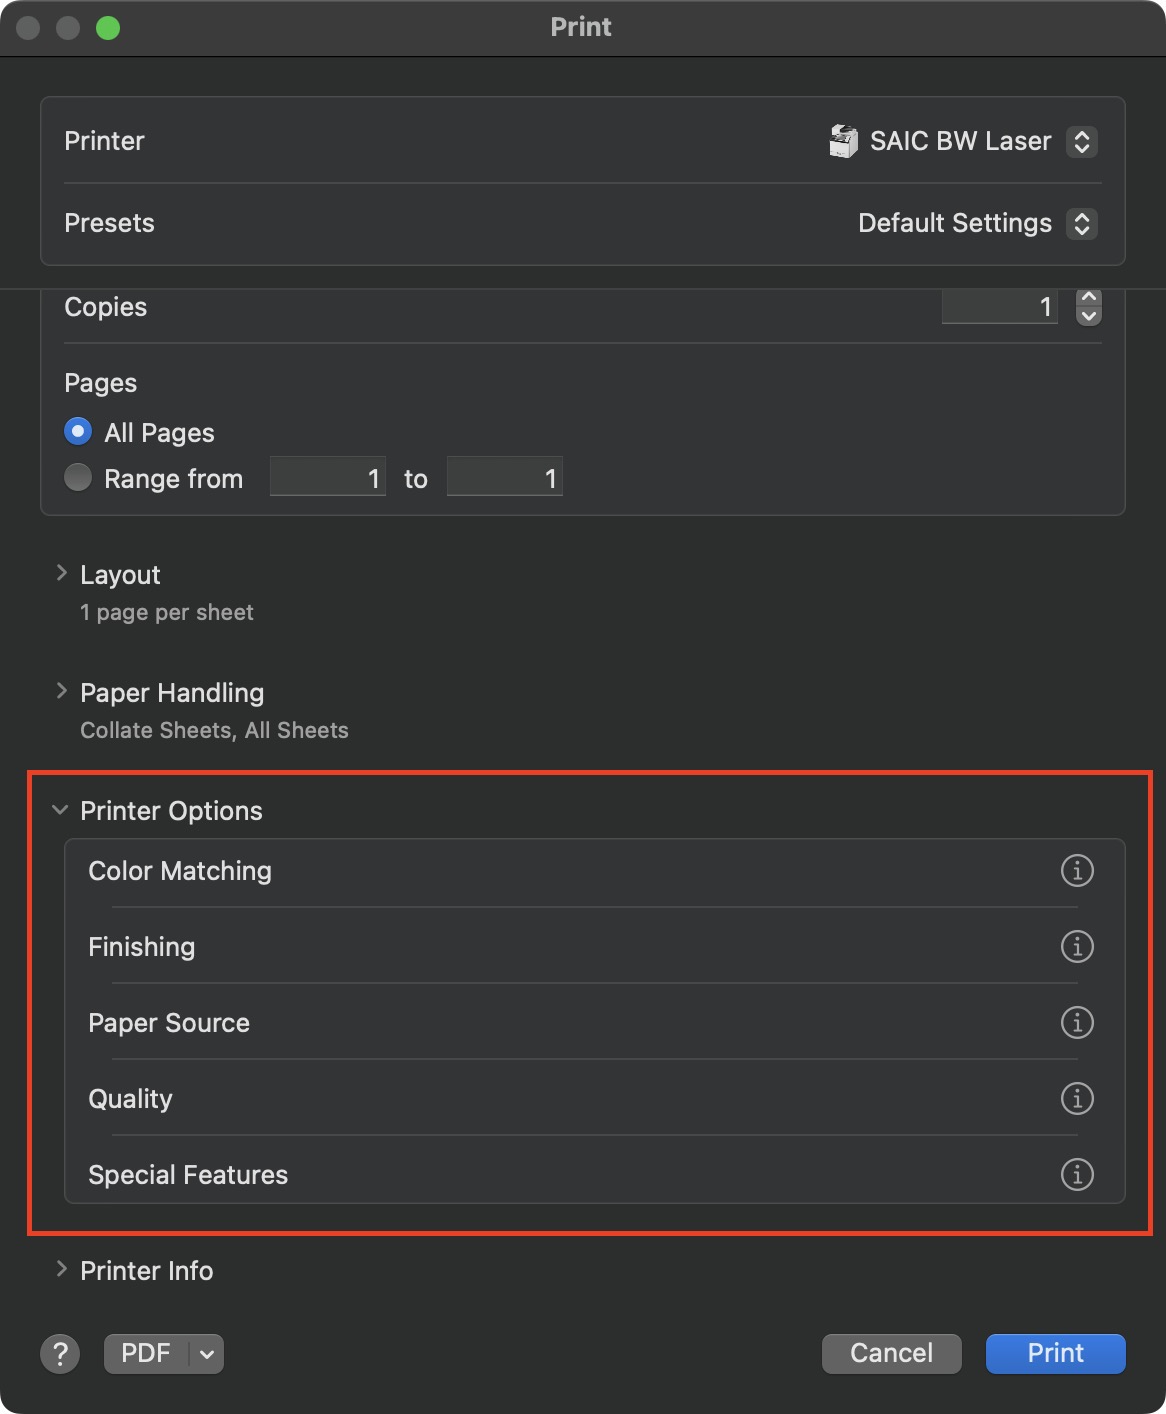 | When sending to the BW Laser or Color Laser Print Queue make sure to select the Printer Options > Finishing menu. |
 | 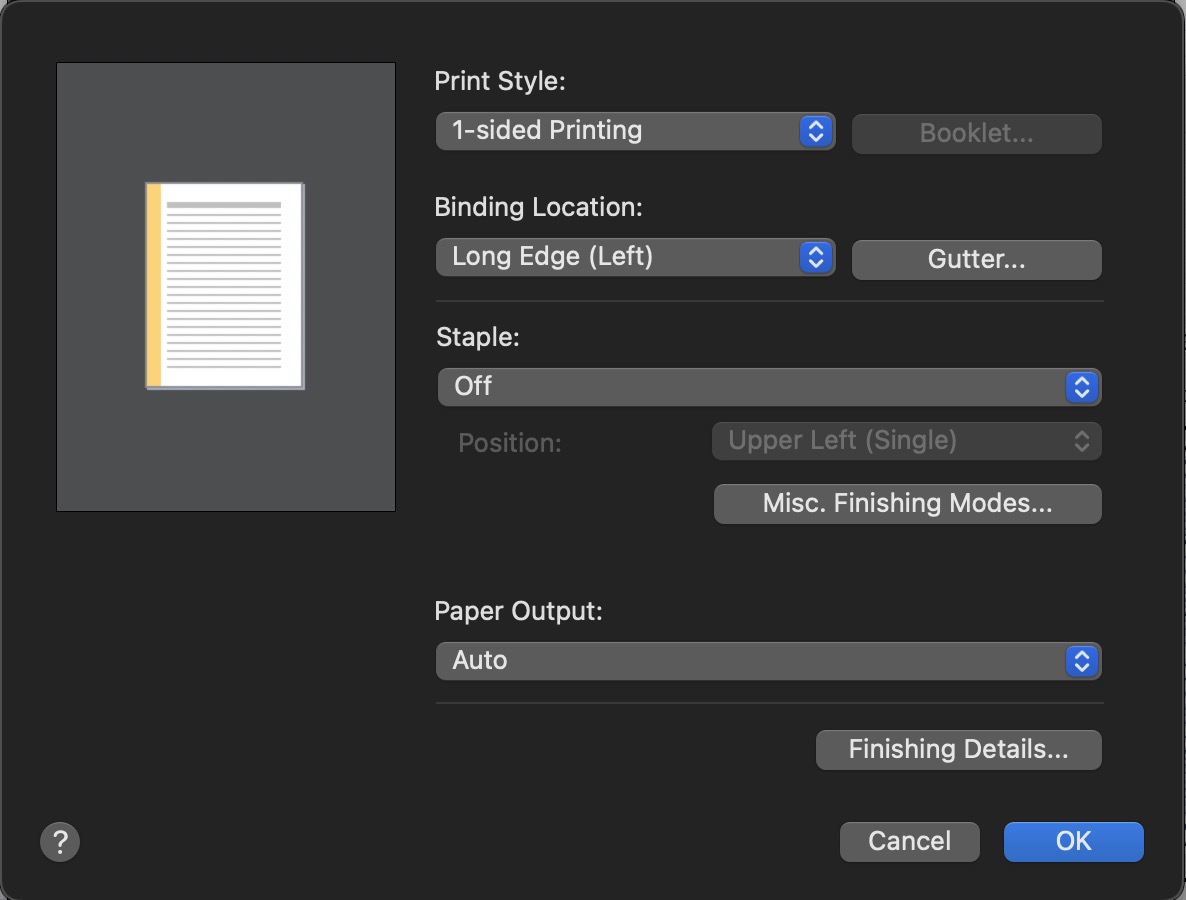 | From here the options are either 1-Sided Printing (default) or 2-Sided Printing. You can also choose the Binding Location as well as Staple options within this dialogue box. Binding Location example:  |
| Option B: PaperCut Print Release on Laser Printers You can also select the double-sided printing options when releasing print jobs at a Color or BW Laser Copier that is running PaperCut: | ||
|  | After swiping your card at the printer choose Print Release. |
| 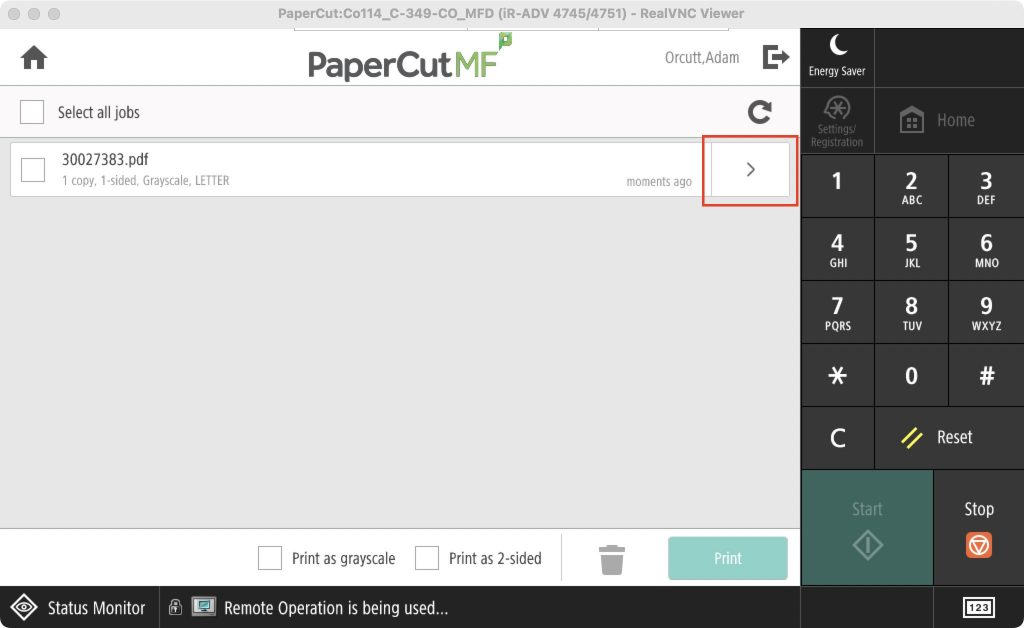 | Select the > next to the print job you would like to set double-siding options. |
 |  | As long as your document is more than 1 pages long, you can choose 2-Sided prints. NOTE: When selecting 2-sided printing through this method, prints will always bind along the Left Long Edge.  |